Register Your Study
Registering a study means describing its basic design: title, description, research focus, conditions, arms or cohorts, eligibility criteria, personnel, planned visits and protocols. You can do this in either of two ways. Both create exactly the same study record and capture the same required information.
| Study Registration Wizard (SRW) | Basic Study Design template | |
|---|---|---|
| What it is | A guided online form | basic_study_design + protocols template files |
| Best for | First-time submitters entering details by hand | Teams preparing many files, or scripting uploads |
| Checks | Validates each page as you go | Validated when you upload the package |
| Packaging | Study only; subjects and results follow as templates | Can go in the same package as subject templates |
| Studies without subjects | Attach your data as Study Files in step 10 | Possible, but the wizard is simpler |
flowchart LR
    A{Entering details by hand?} -- Yes --> C[Registration Wizard]
    A -- "No, files or scripts" --> D[Basic Study Design template]
    C --> E([Study registered])
    D --> E
    E --> F[Subjects, samples, results]
Option A: Study Registration Wizard
Open the Study Registration Wizard and sign in. Choose your workspace and click Register Study. If no workspace appears, see Get a workspace.
The wizard has 11 steps. Required fields have a red asterisk, and Next stays grey until they're filled. You can Save and come back at any time.
| Step | What you enter | |
|---|---|---|
| 1. Basic info | required | User-defined ID, titles, brief description and other study details |
| 2. Categorization | required | One research focus (or No Research Focus Specified) |
| 3. Condition or disease | required | One or more conditions; add a new one if it's missing |
| 4. Arm or cohort | required | At least one arm or cohort: ID, name, description, type |
| 5. Inclusion/exclusion | required | Eligibility criteria, or tick no criteria |
| 6. Personnel | required | People on the study: name, organization, email, role |
| 7. Planned visit | required | Visit schedule, or tick not applicable |
| 8. Protocol | required | Choose an existing protocol or upload a new protocol file |
| 9. Publications / study links | optional | Planned release date, publications (a PubMed ID fills in the rest), links |
| 10. Study file | optional | Extra files: data dictionaries, case report forms, custom data files (no .zip) |
| 11. Validate and upload | required | Click Submit to ImmPort to validate and load the study |
After you submit, the Submission Status page shows whether the upload is Pending, Completed or Rejected, and you receive an email with downloadable reports. For a rejected upload, open the upload ticket to see the errors.
You can edit or delete entries in any step before you submit. Steps 4–10 use Edit and Delete pop-ups.
Screenshots of each step
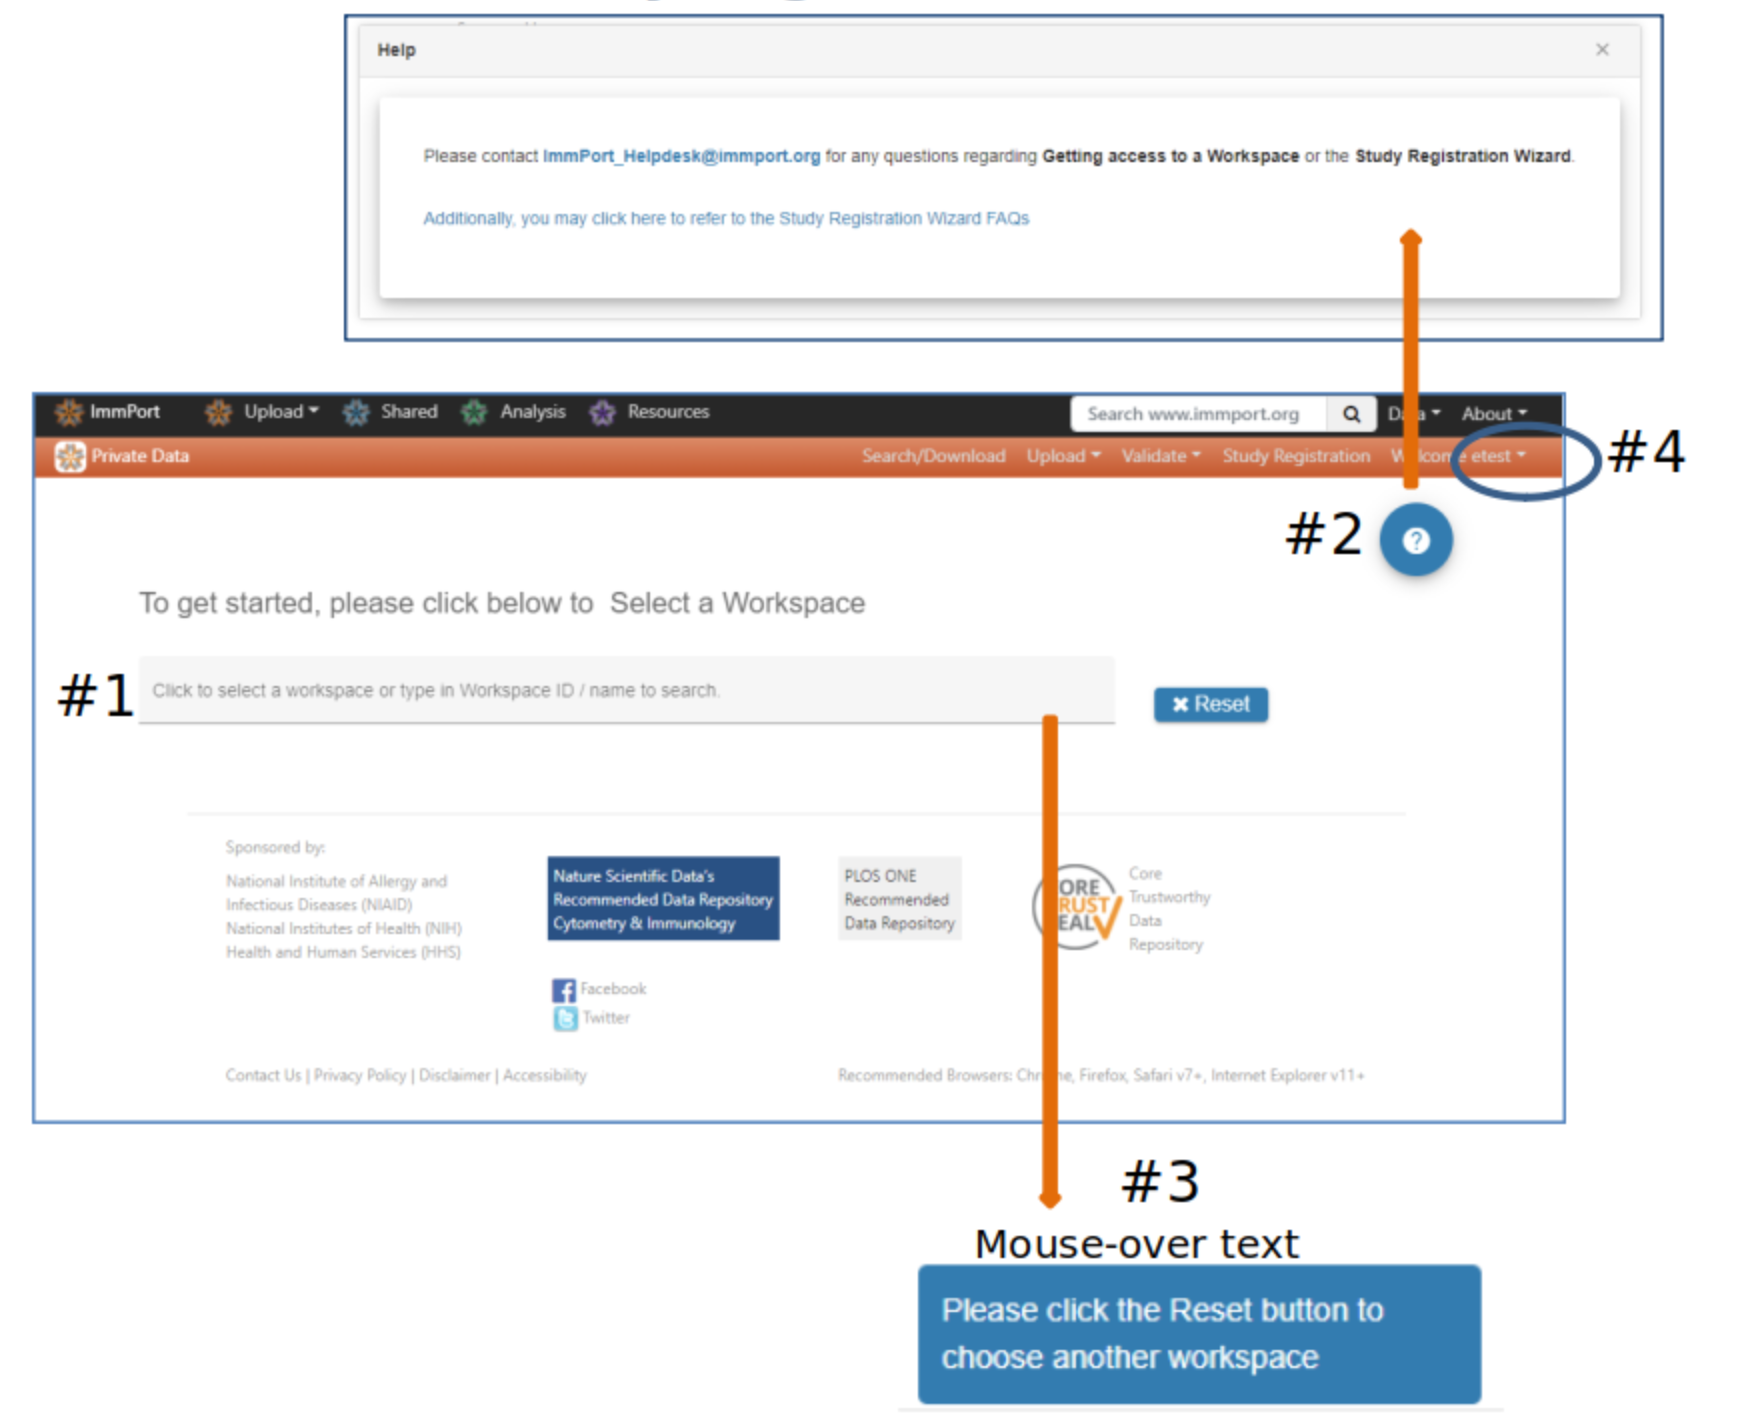
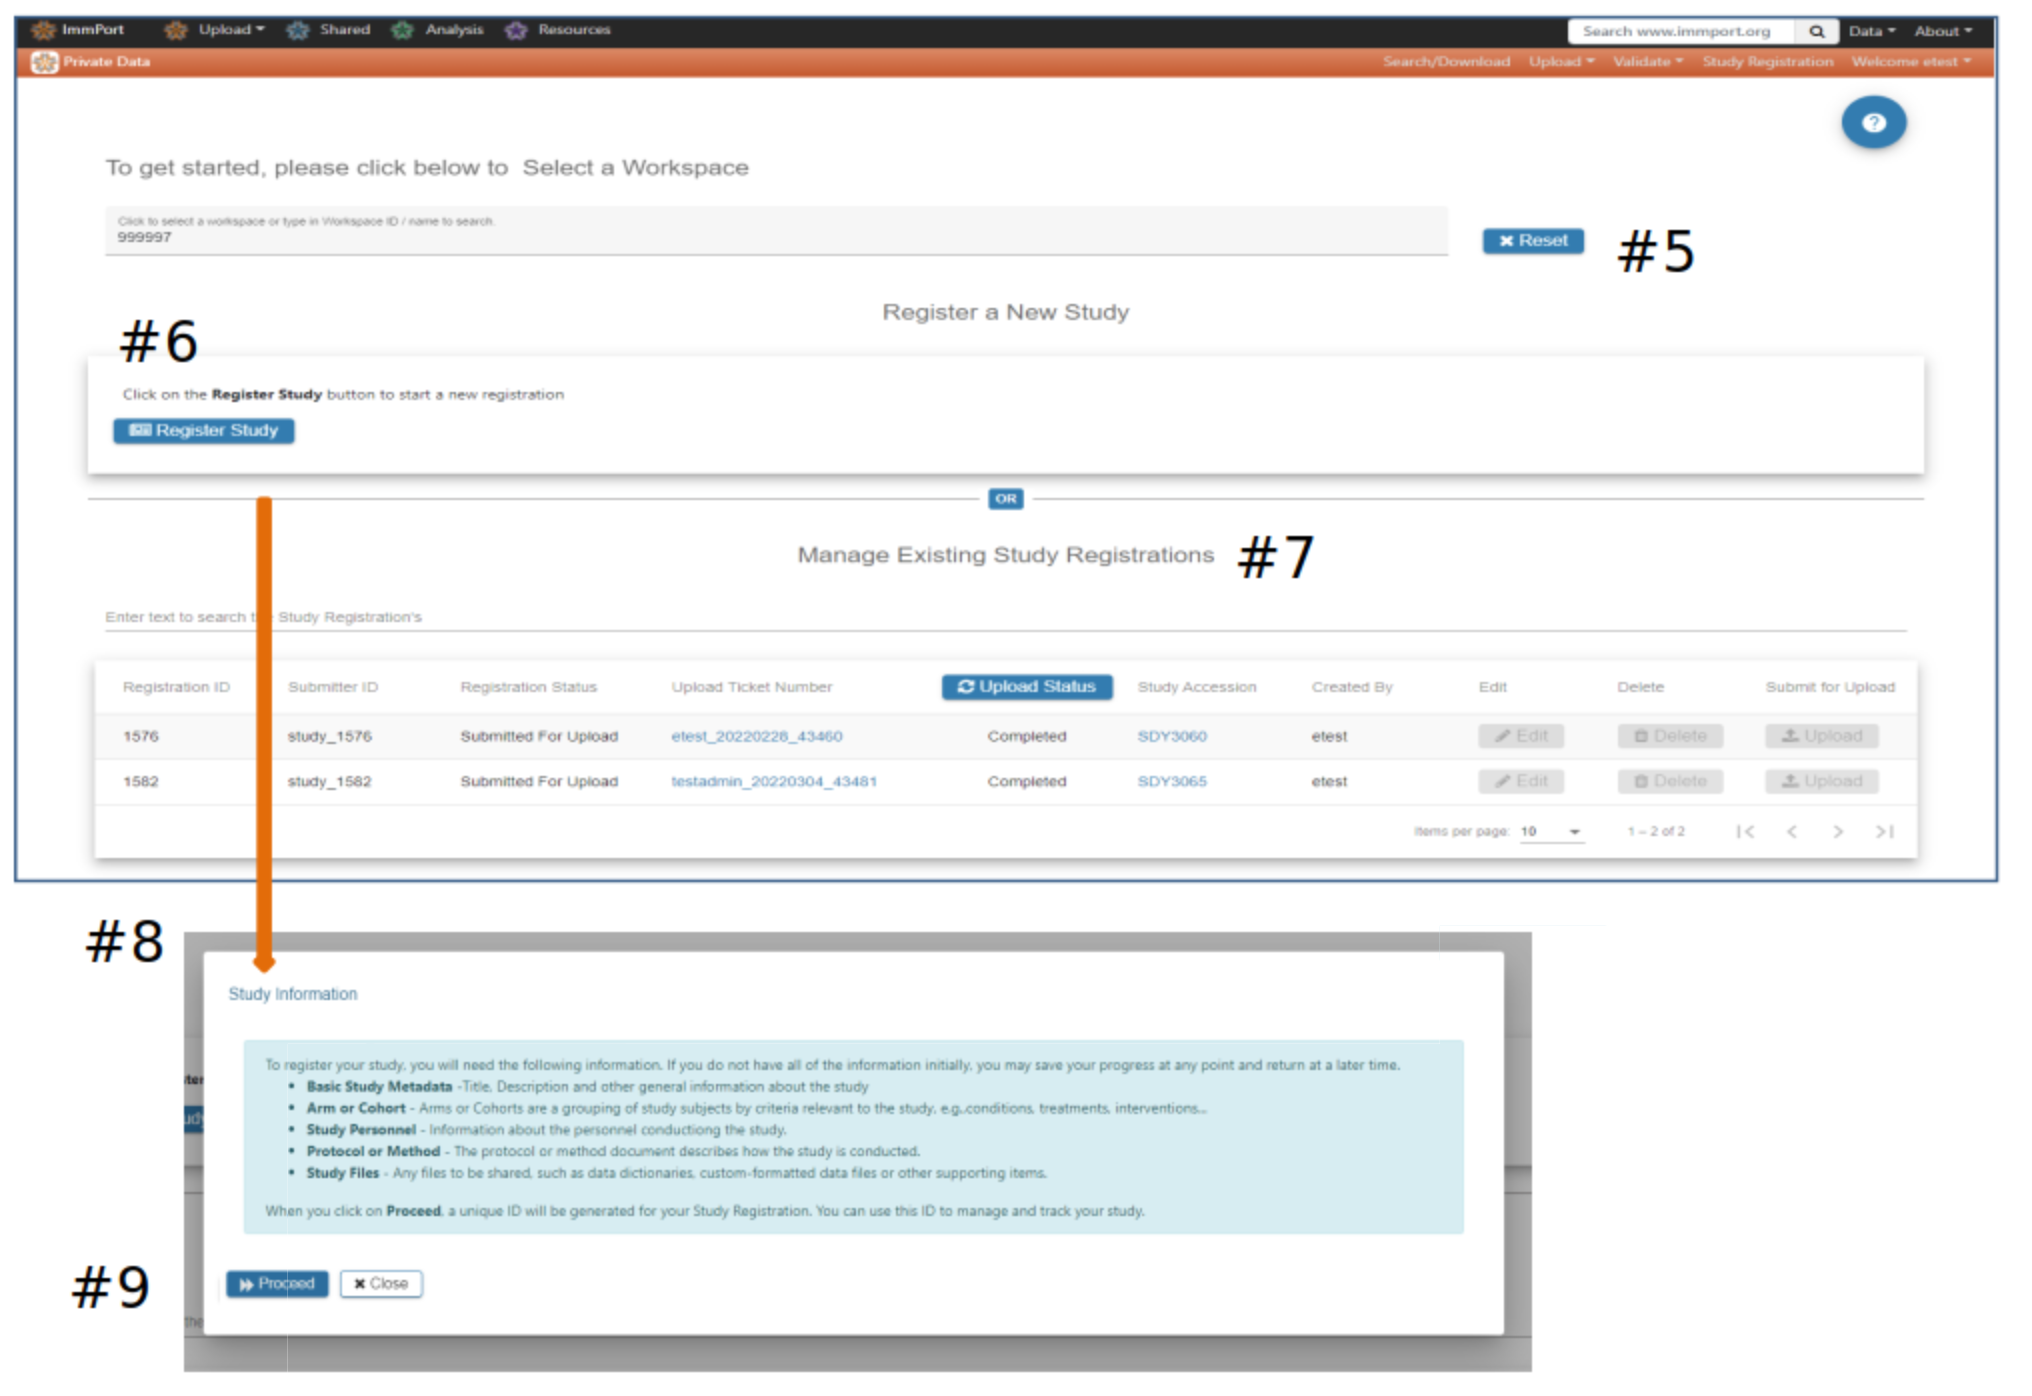
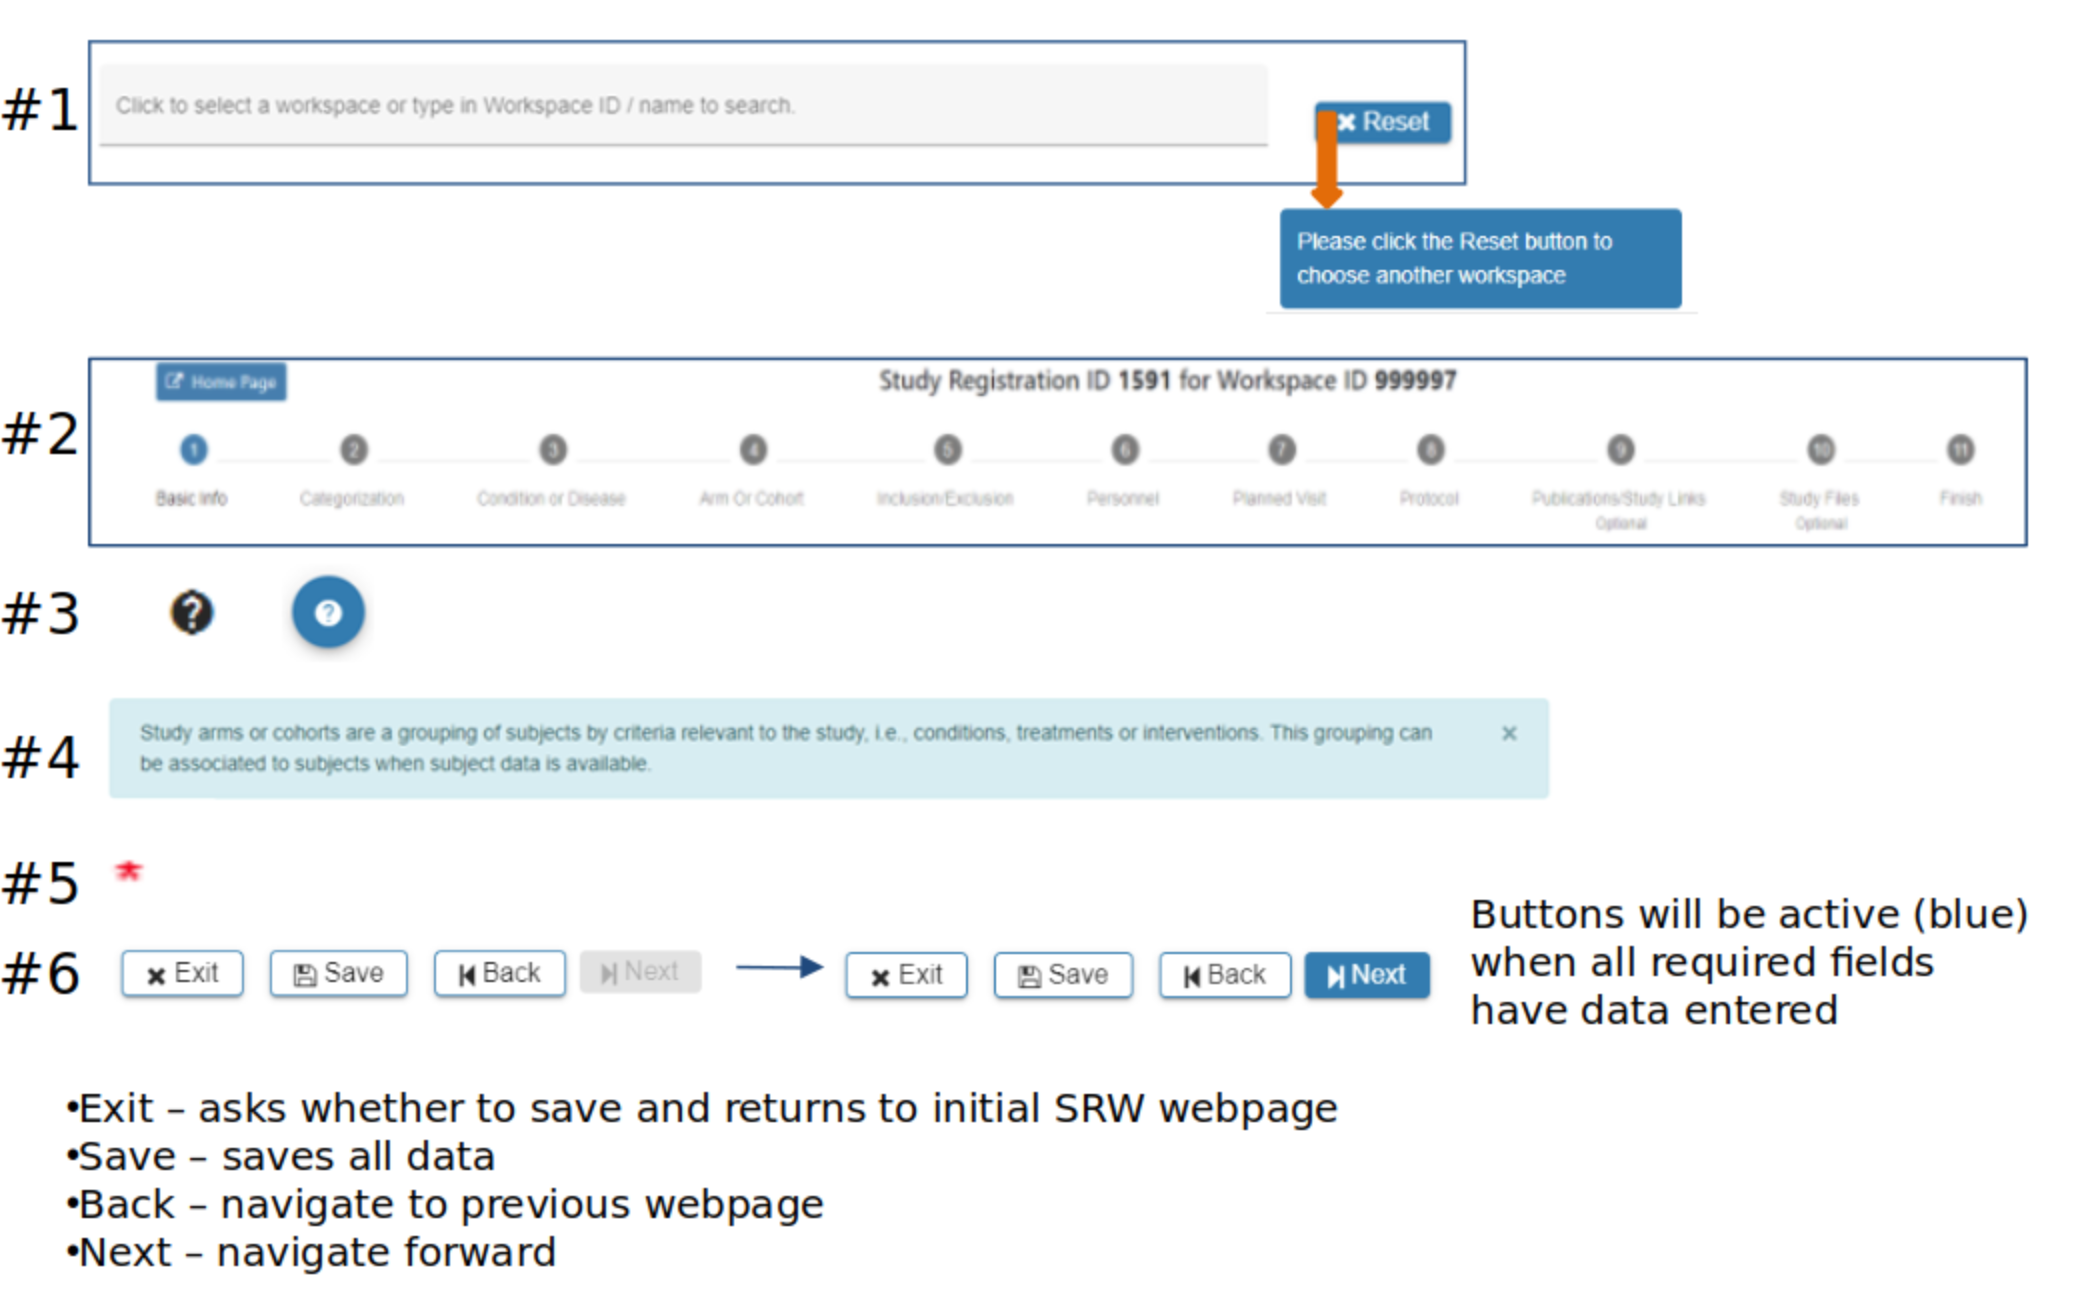
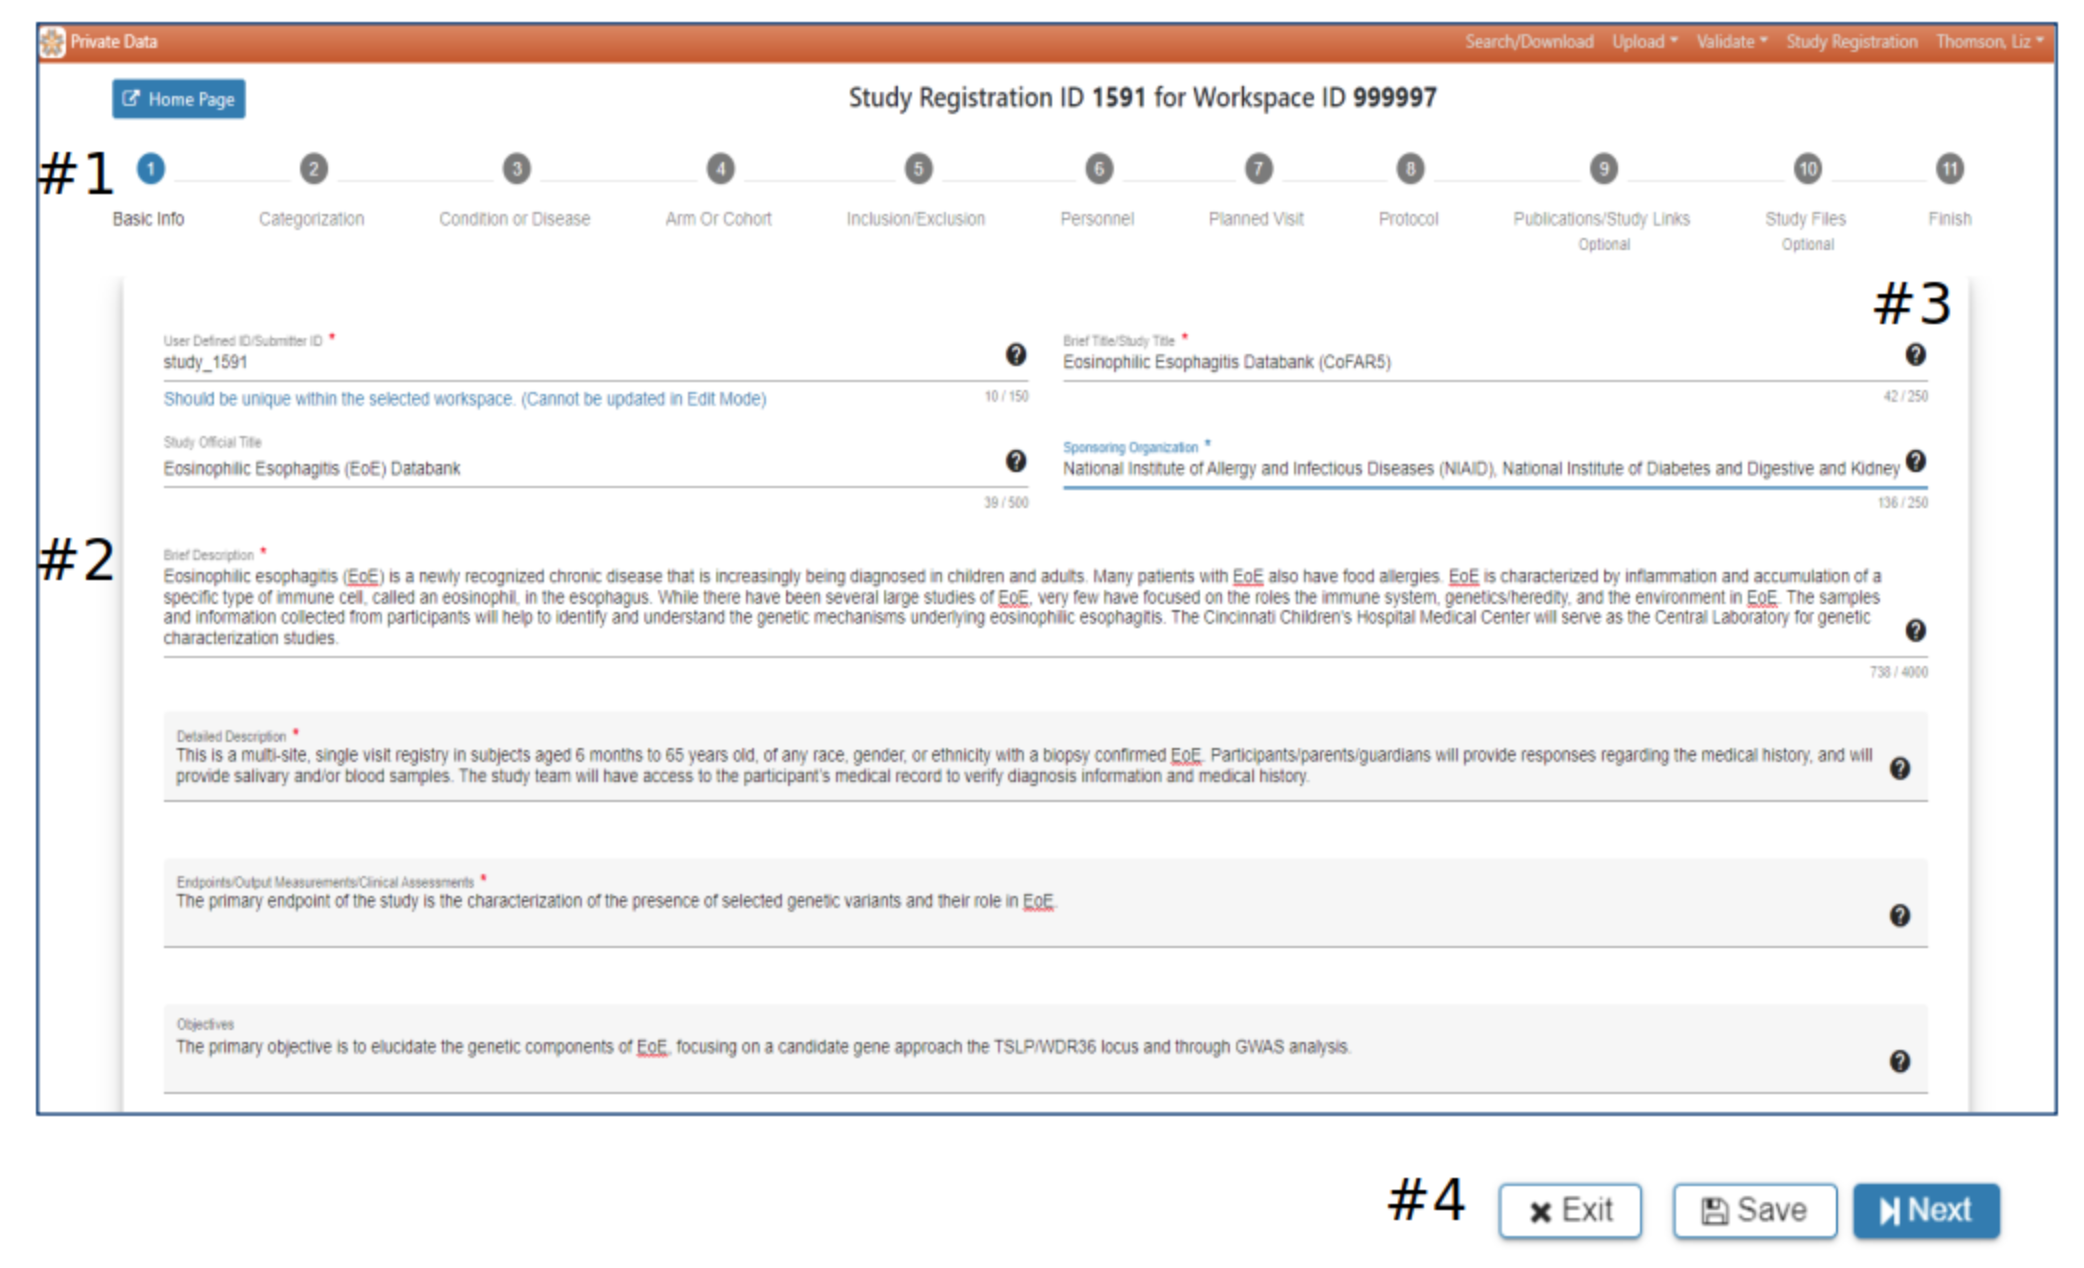
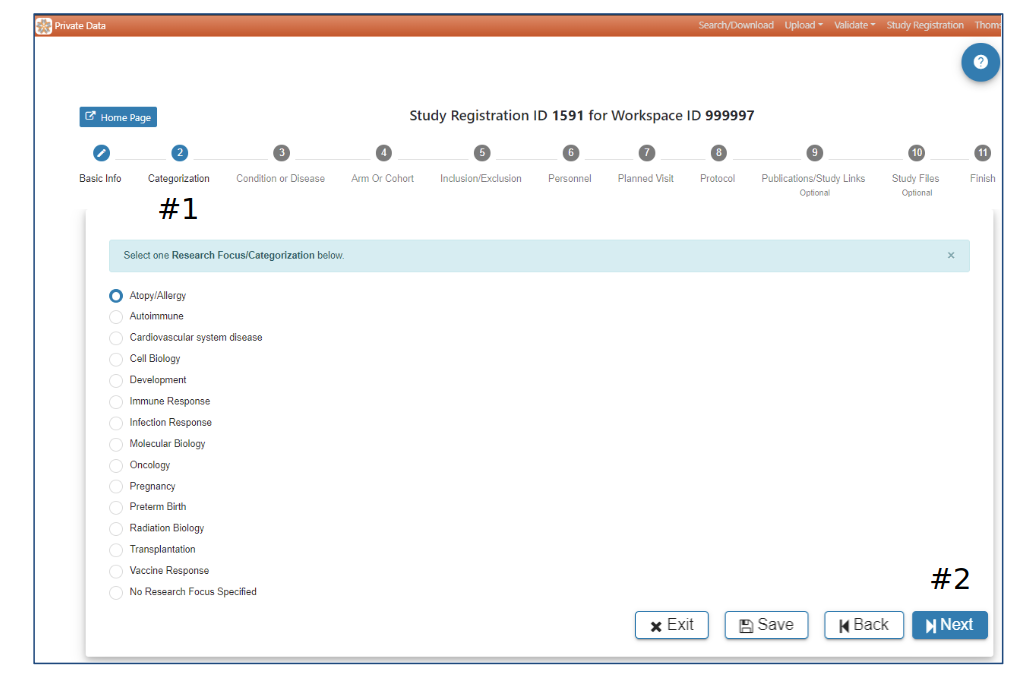
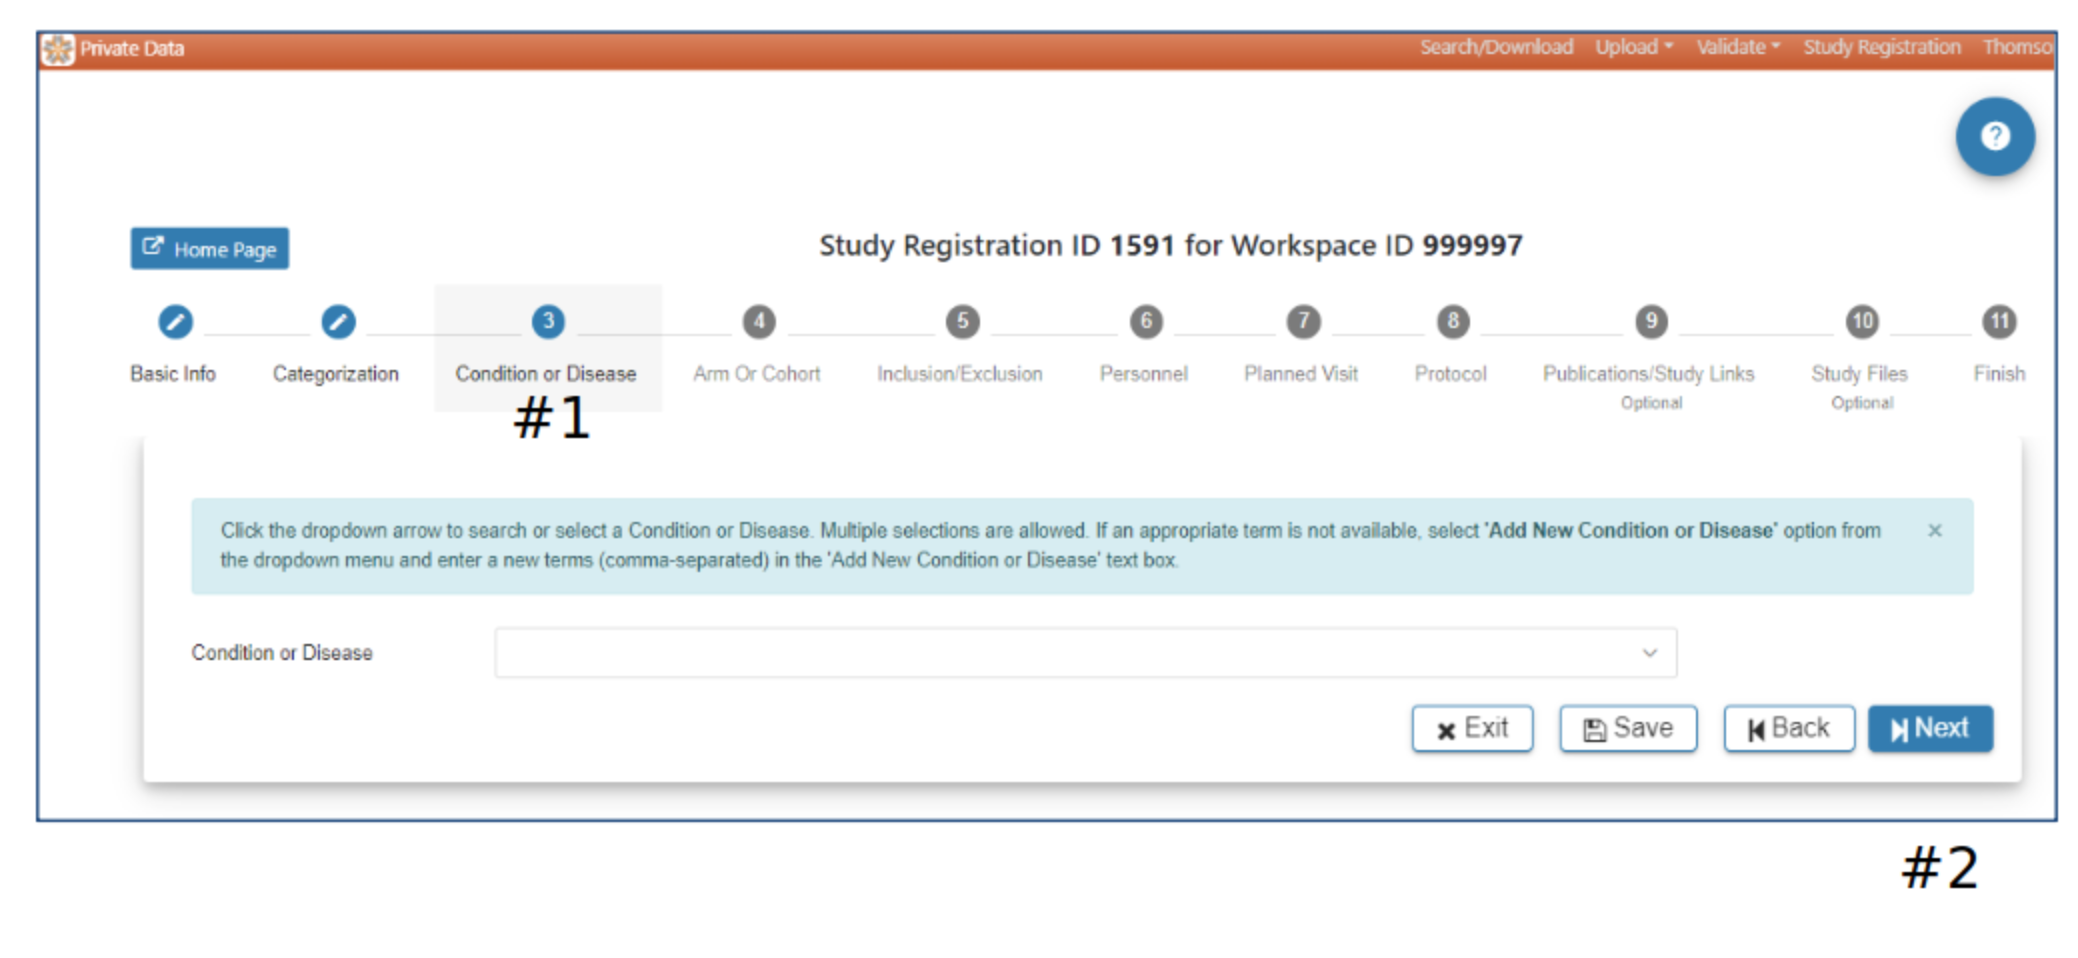
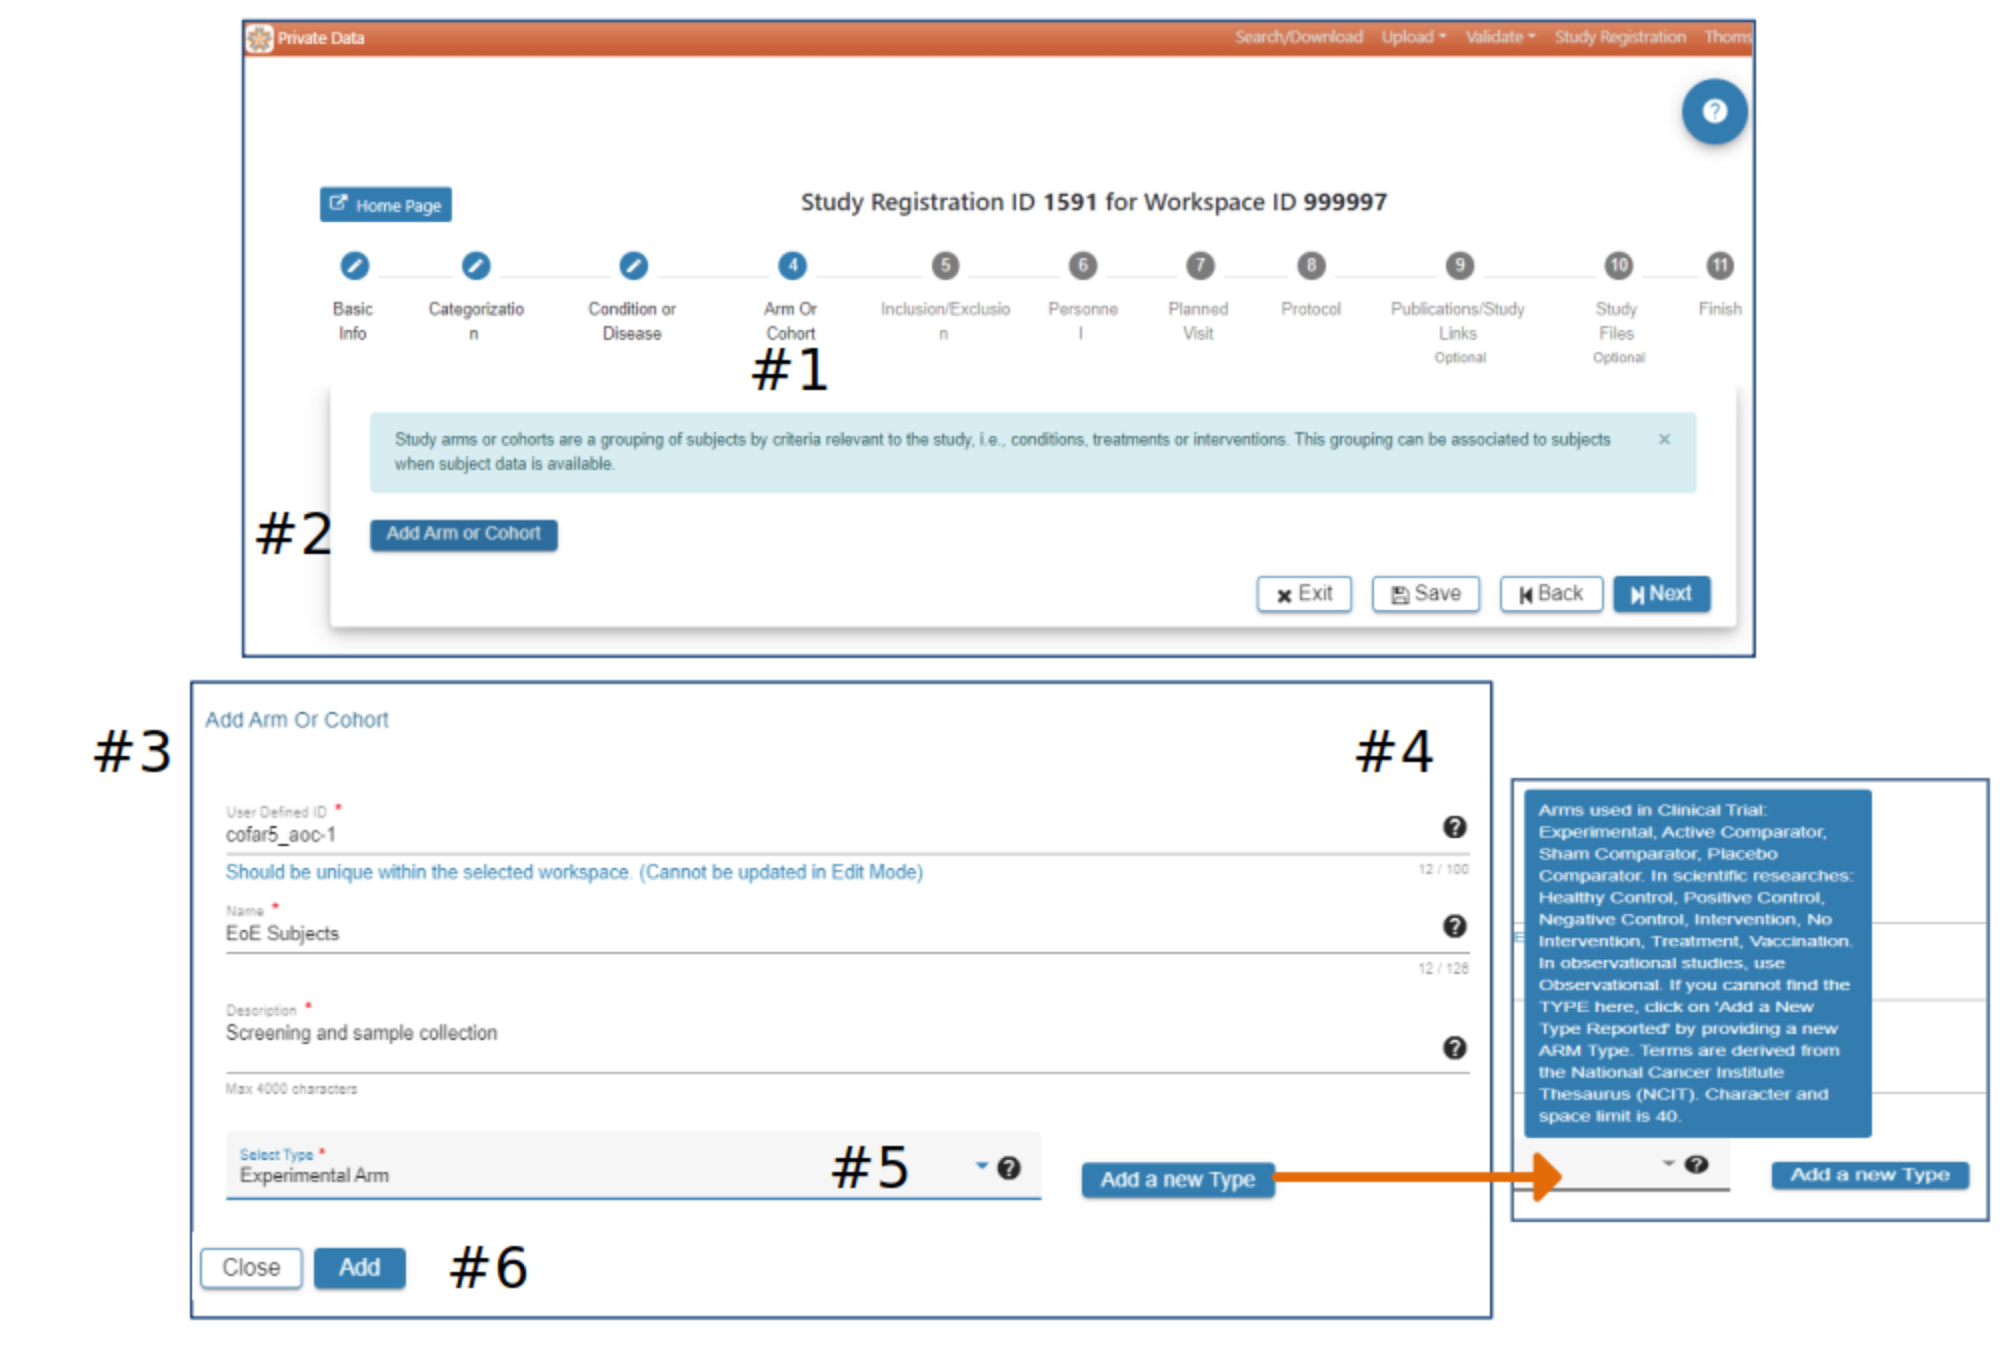
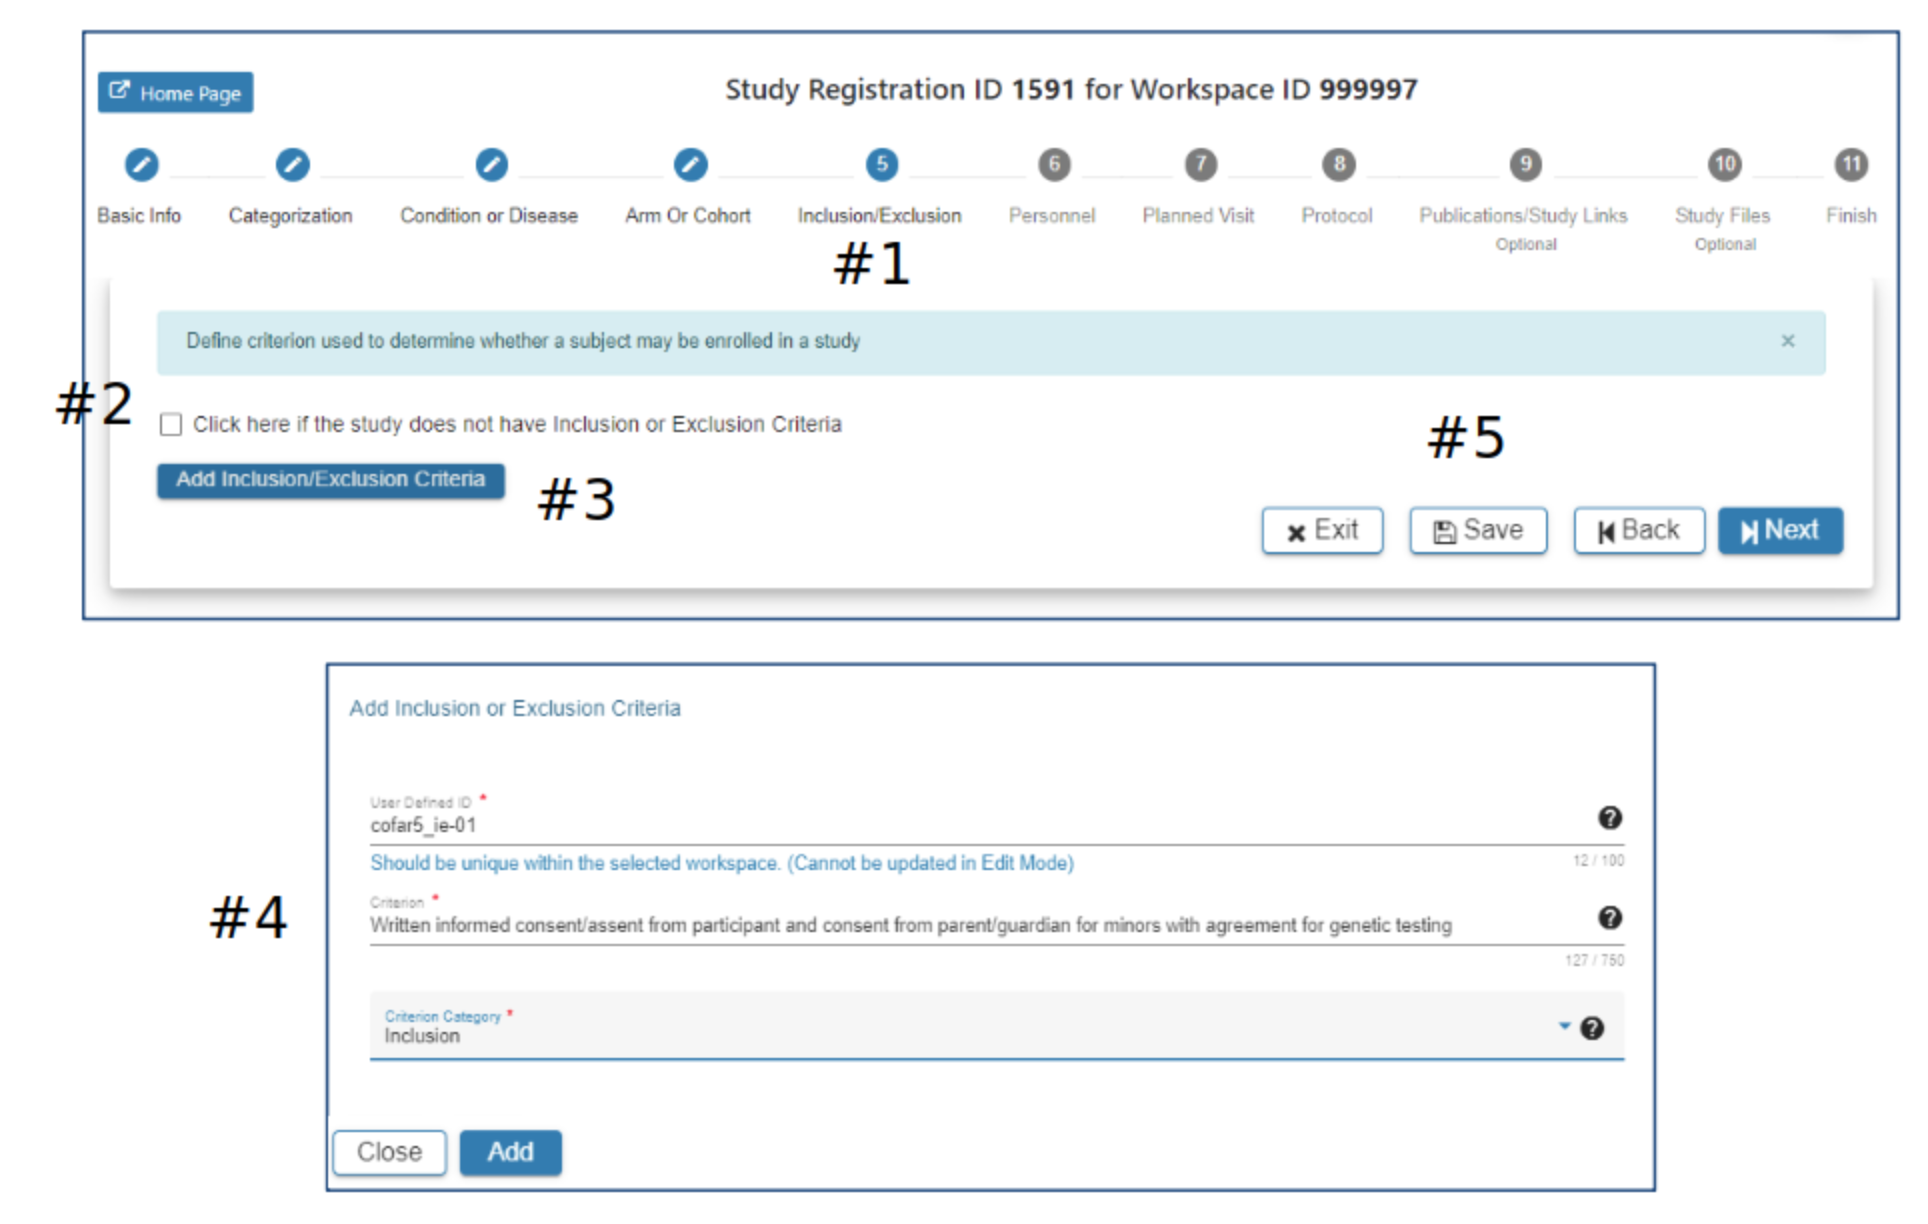
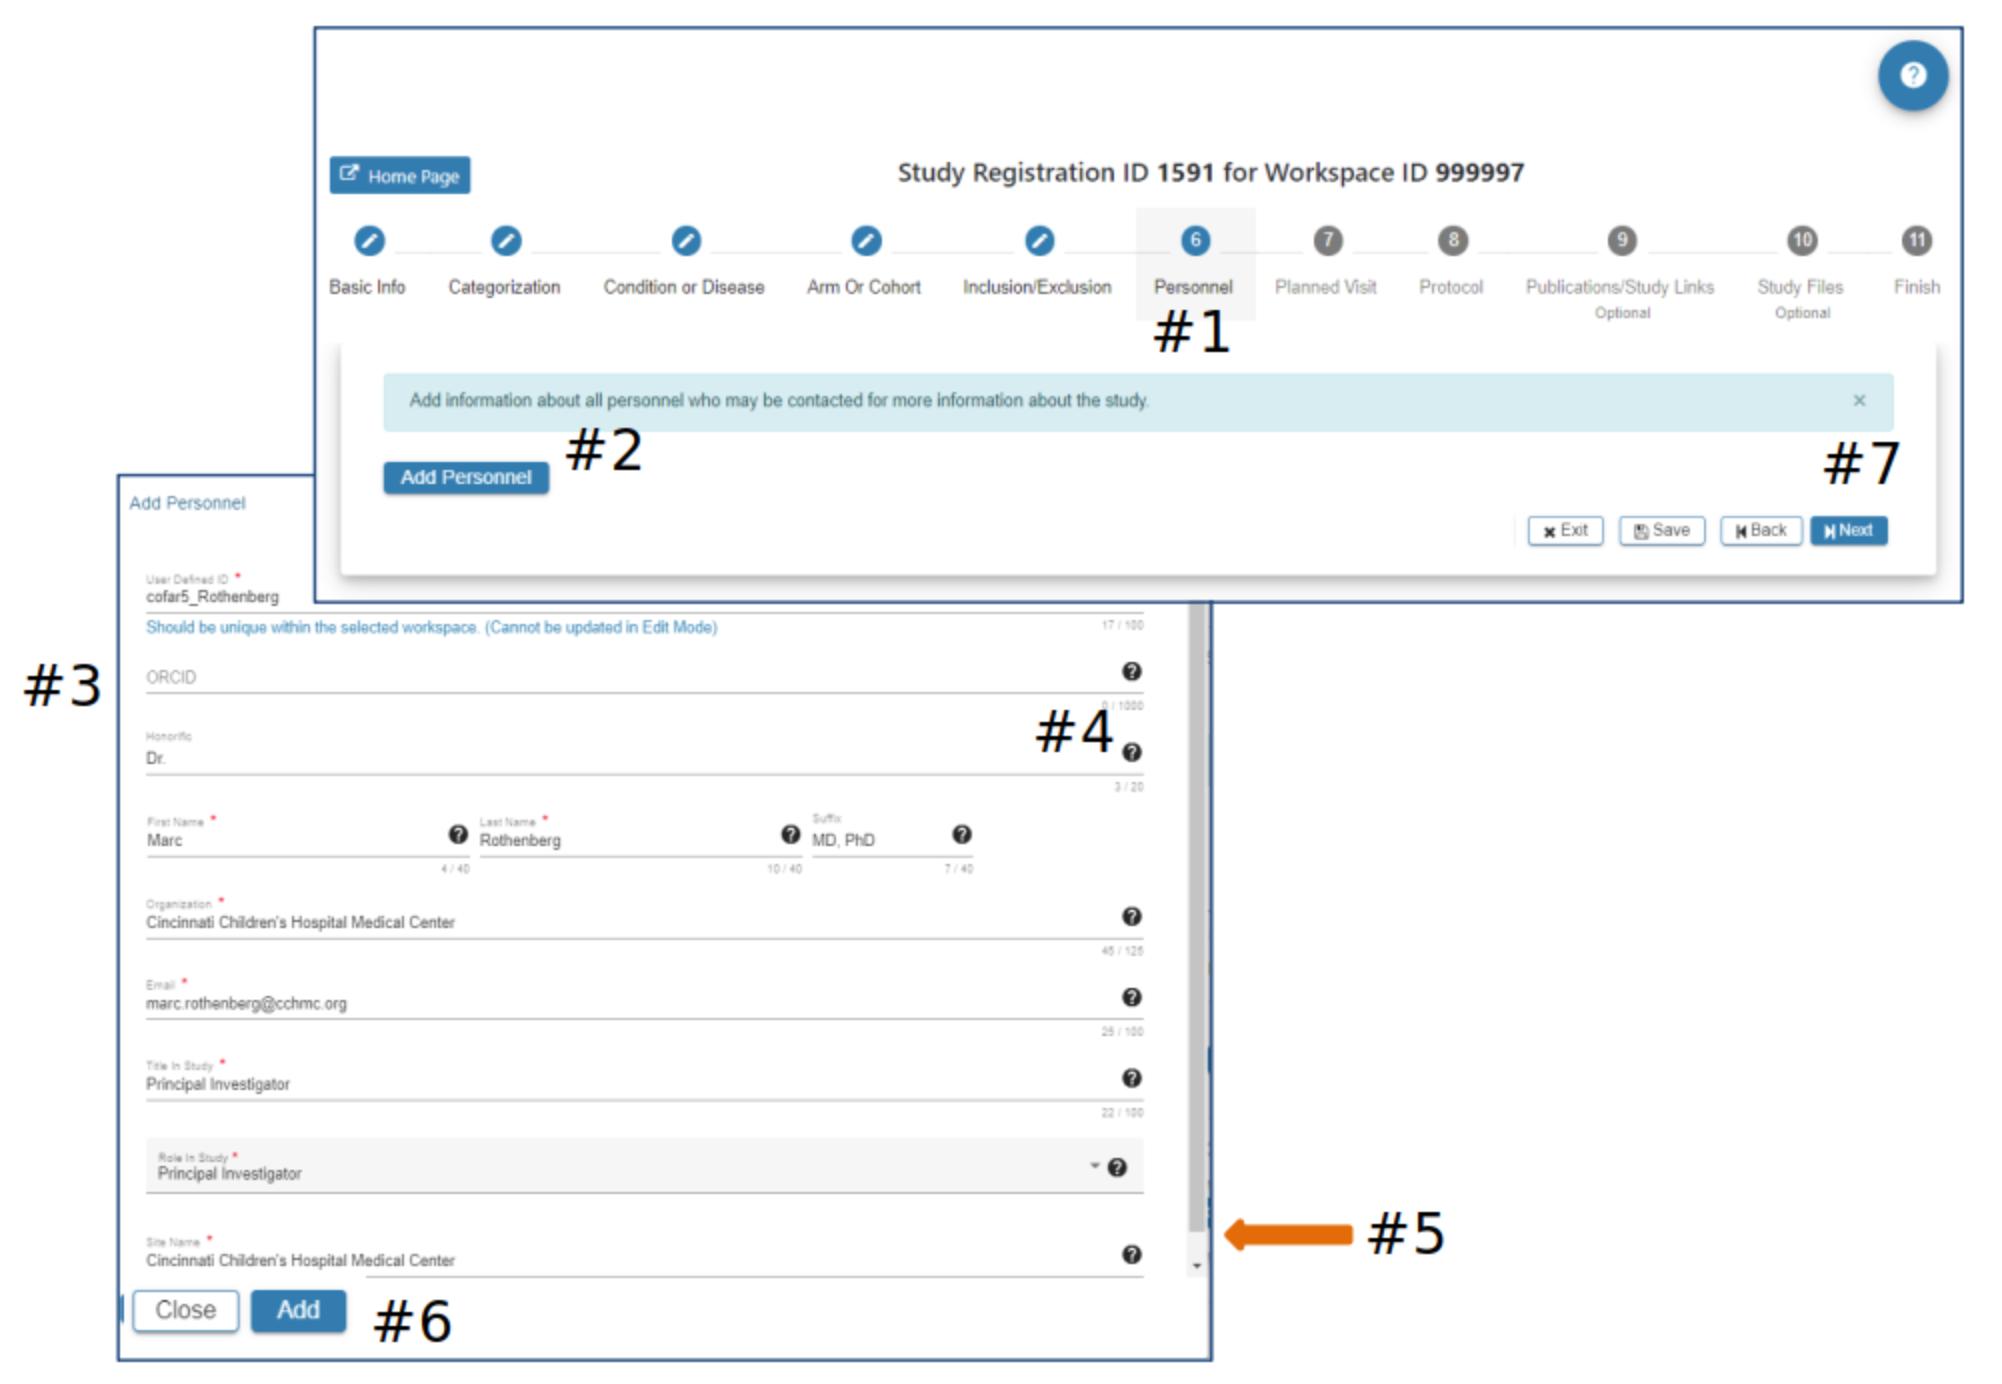
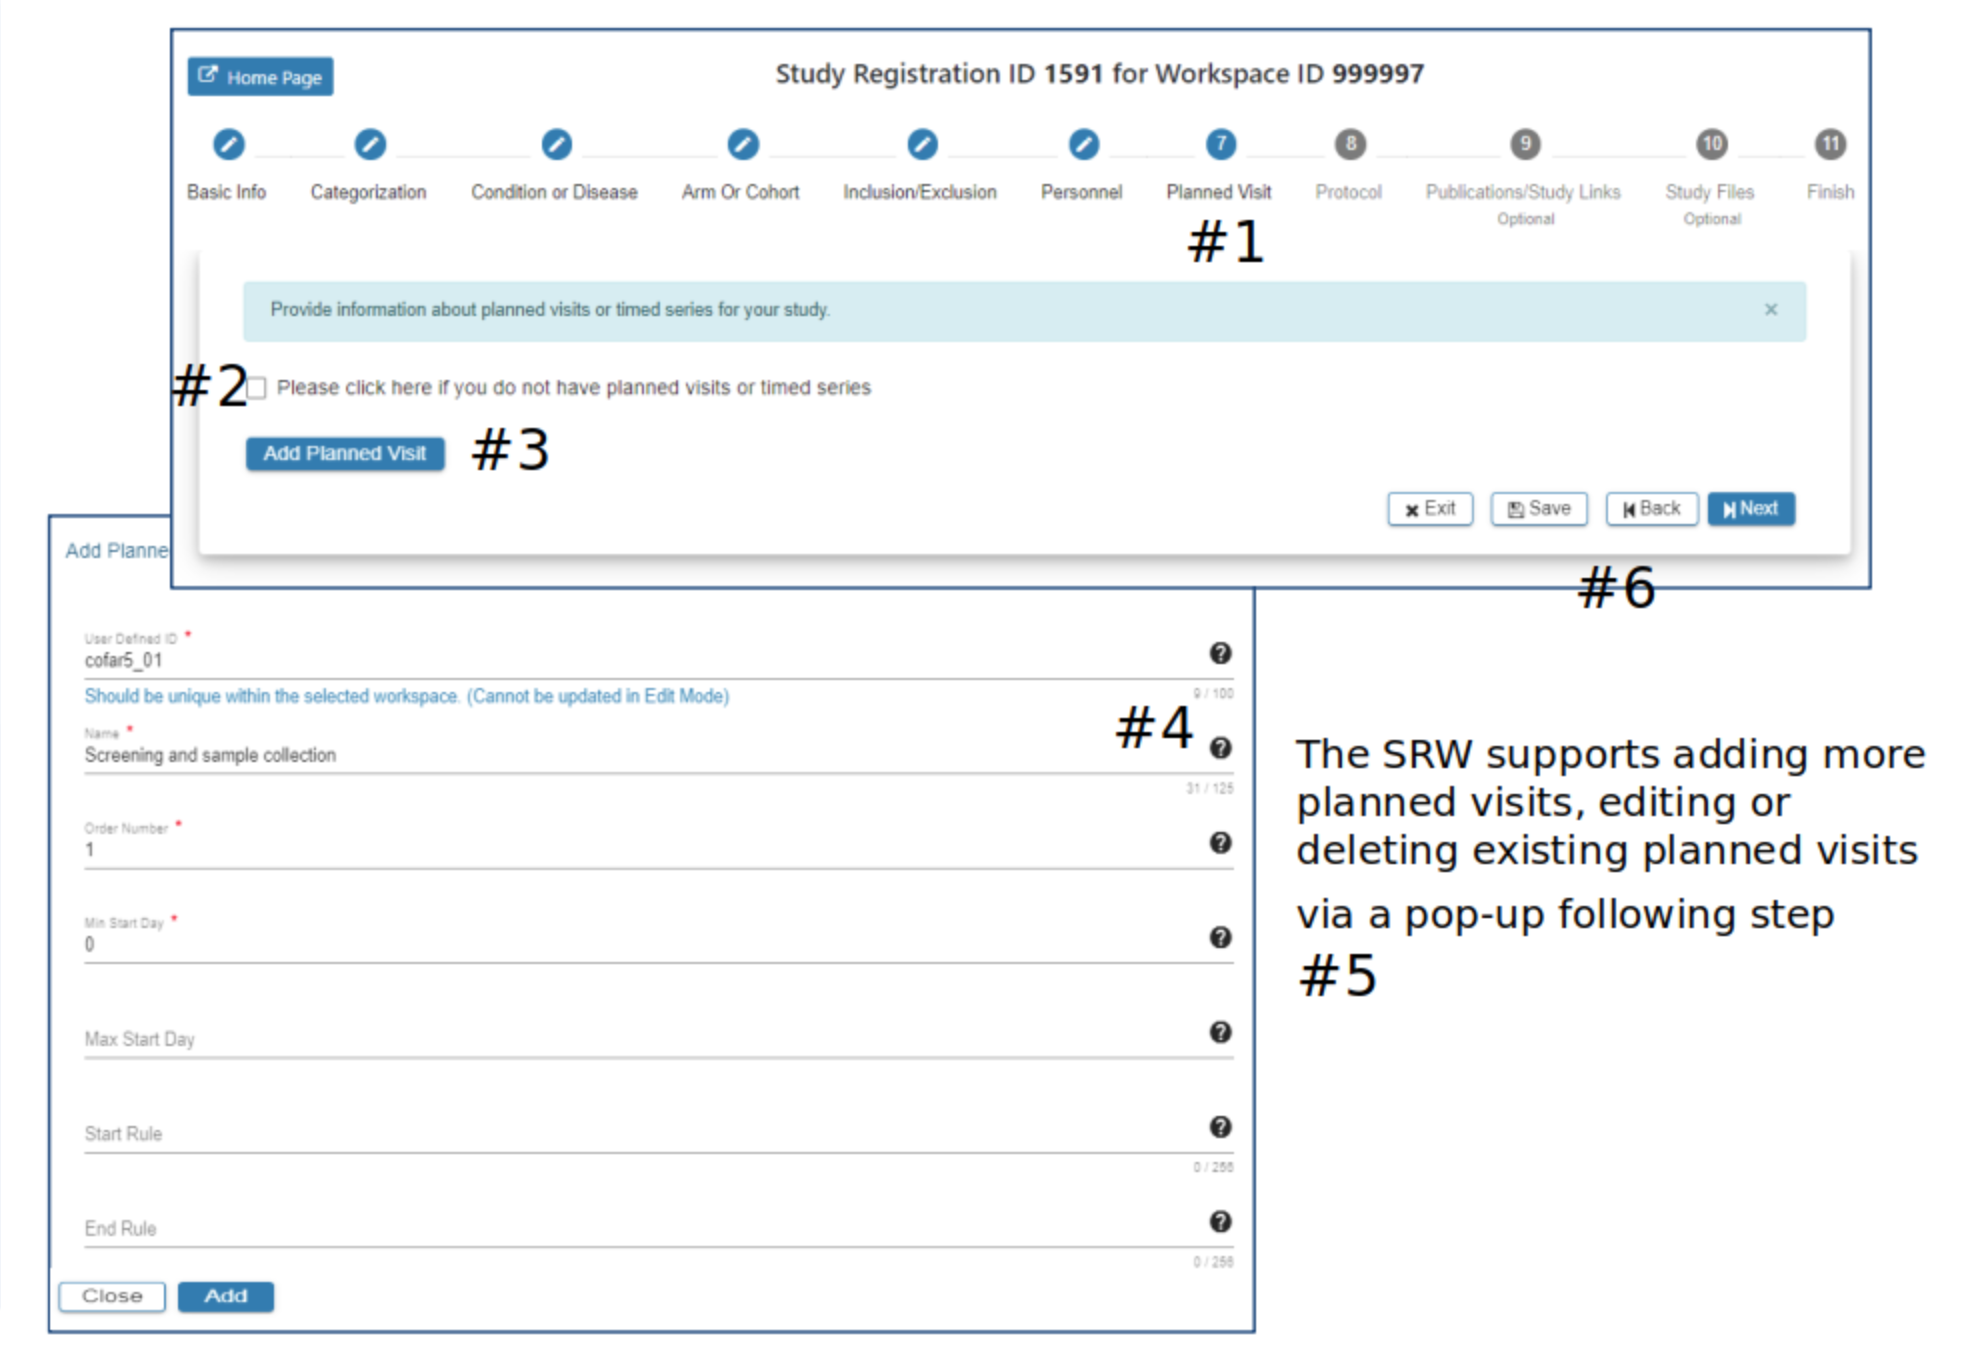
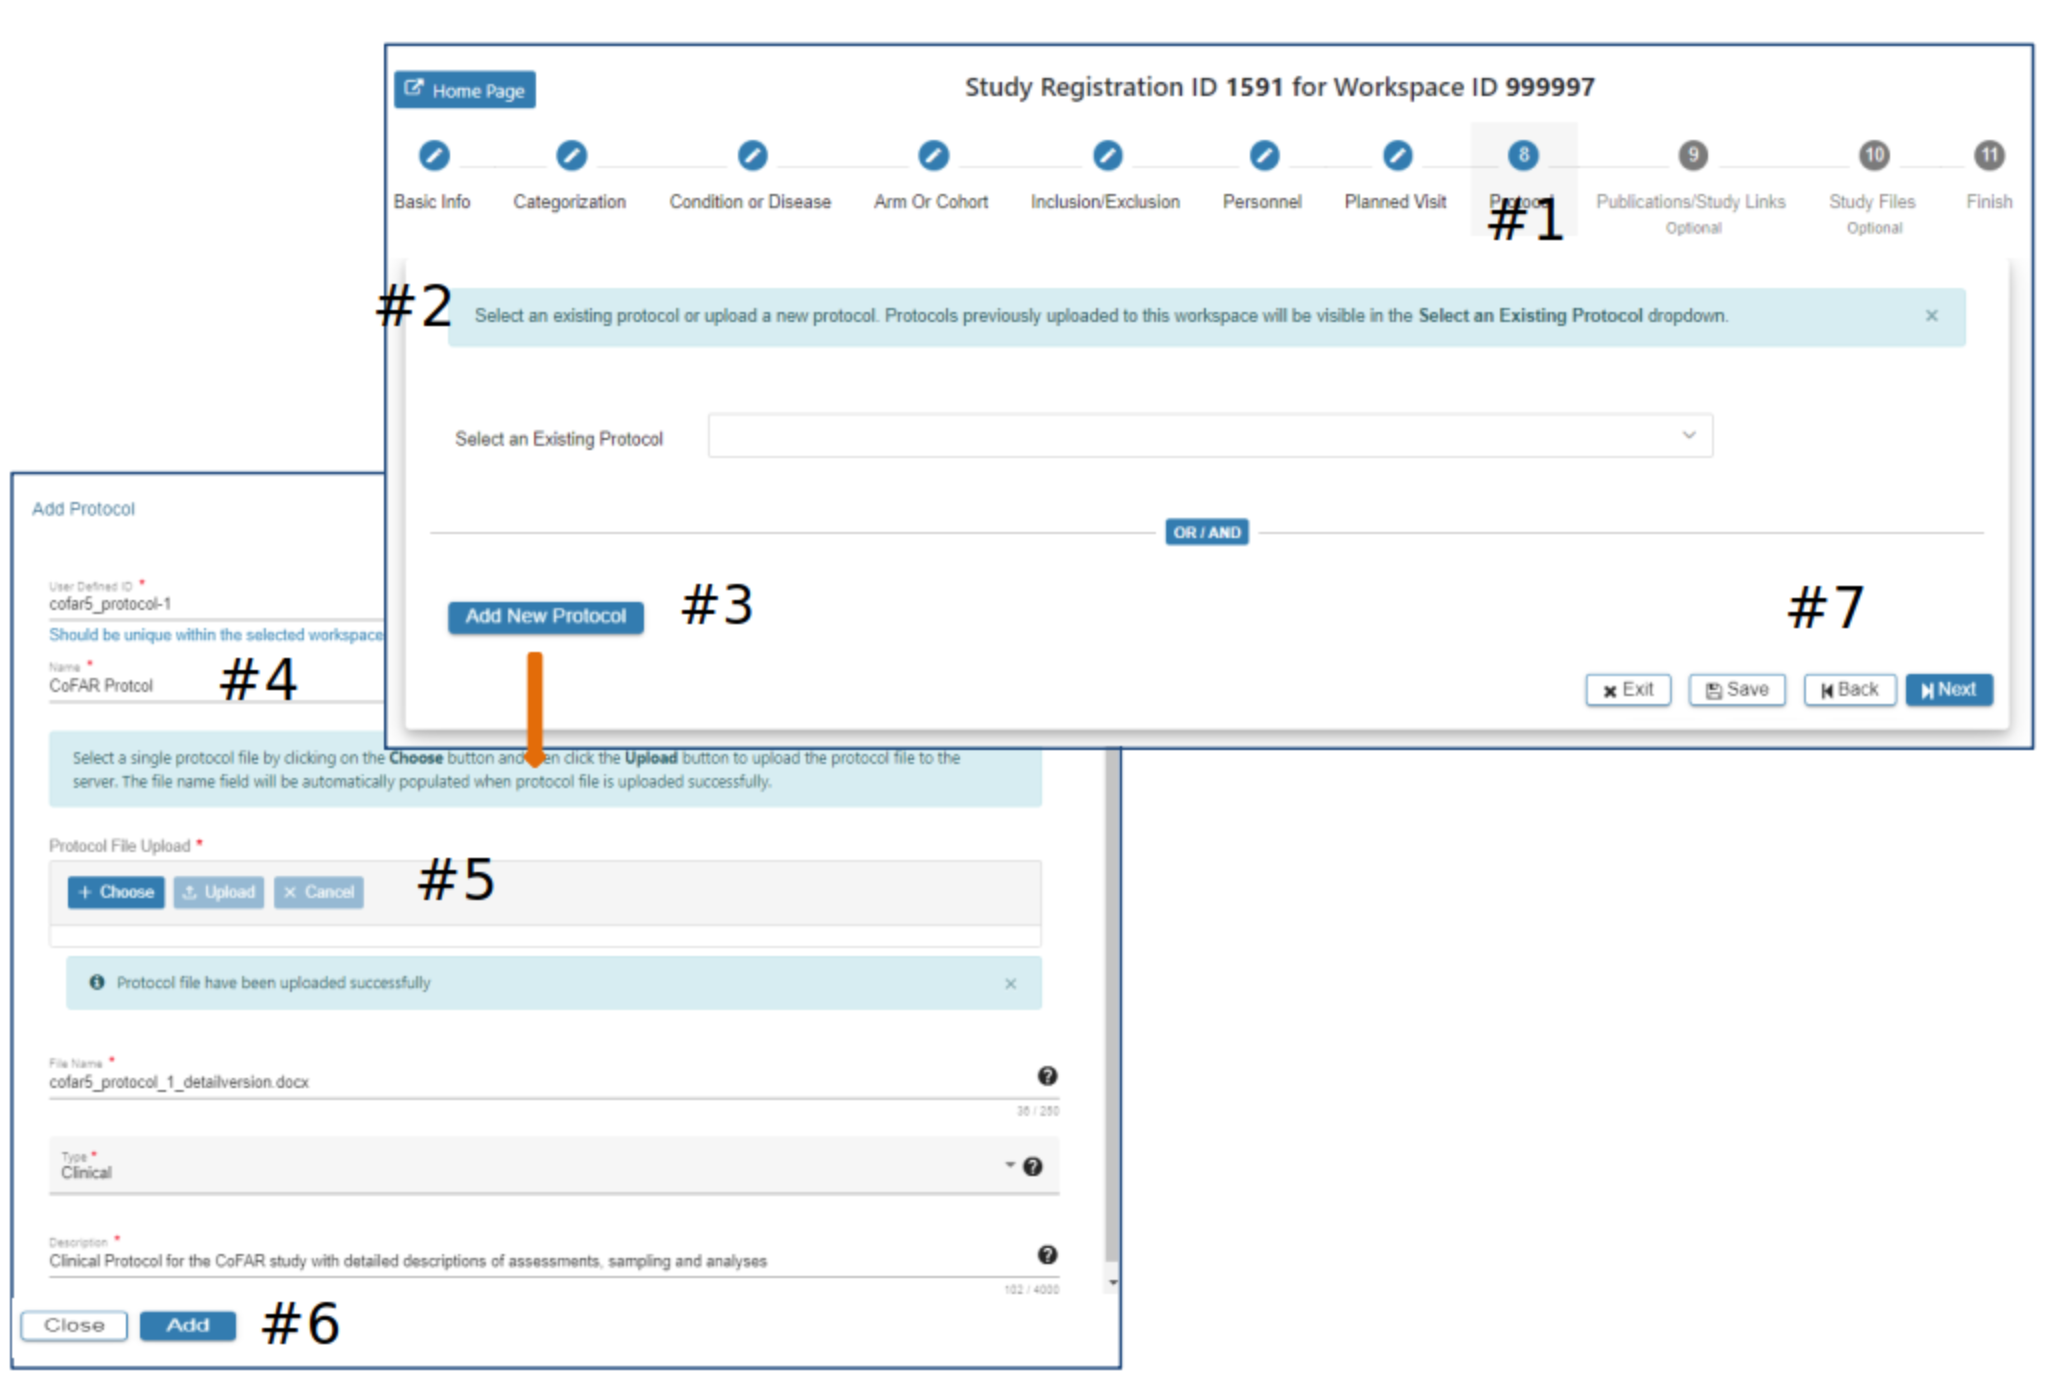
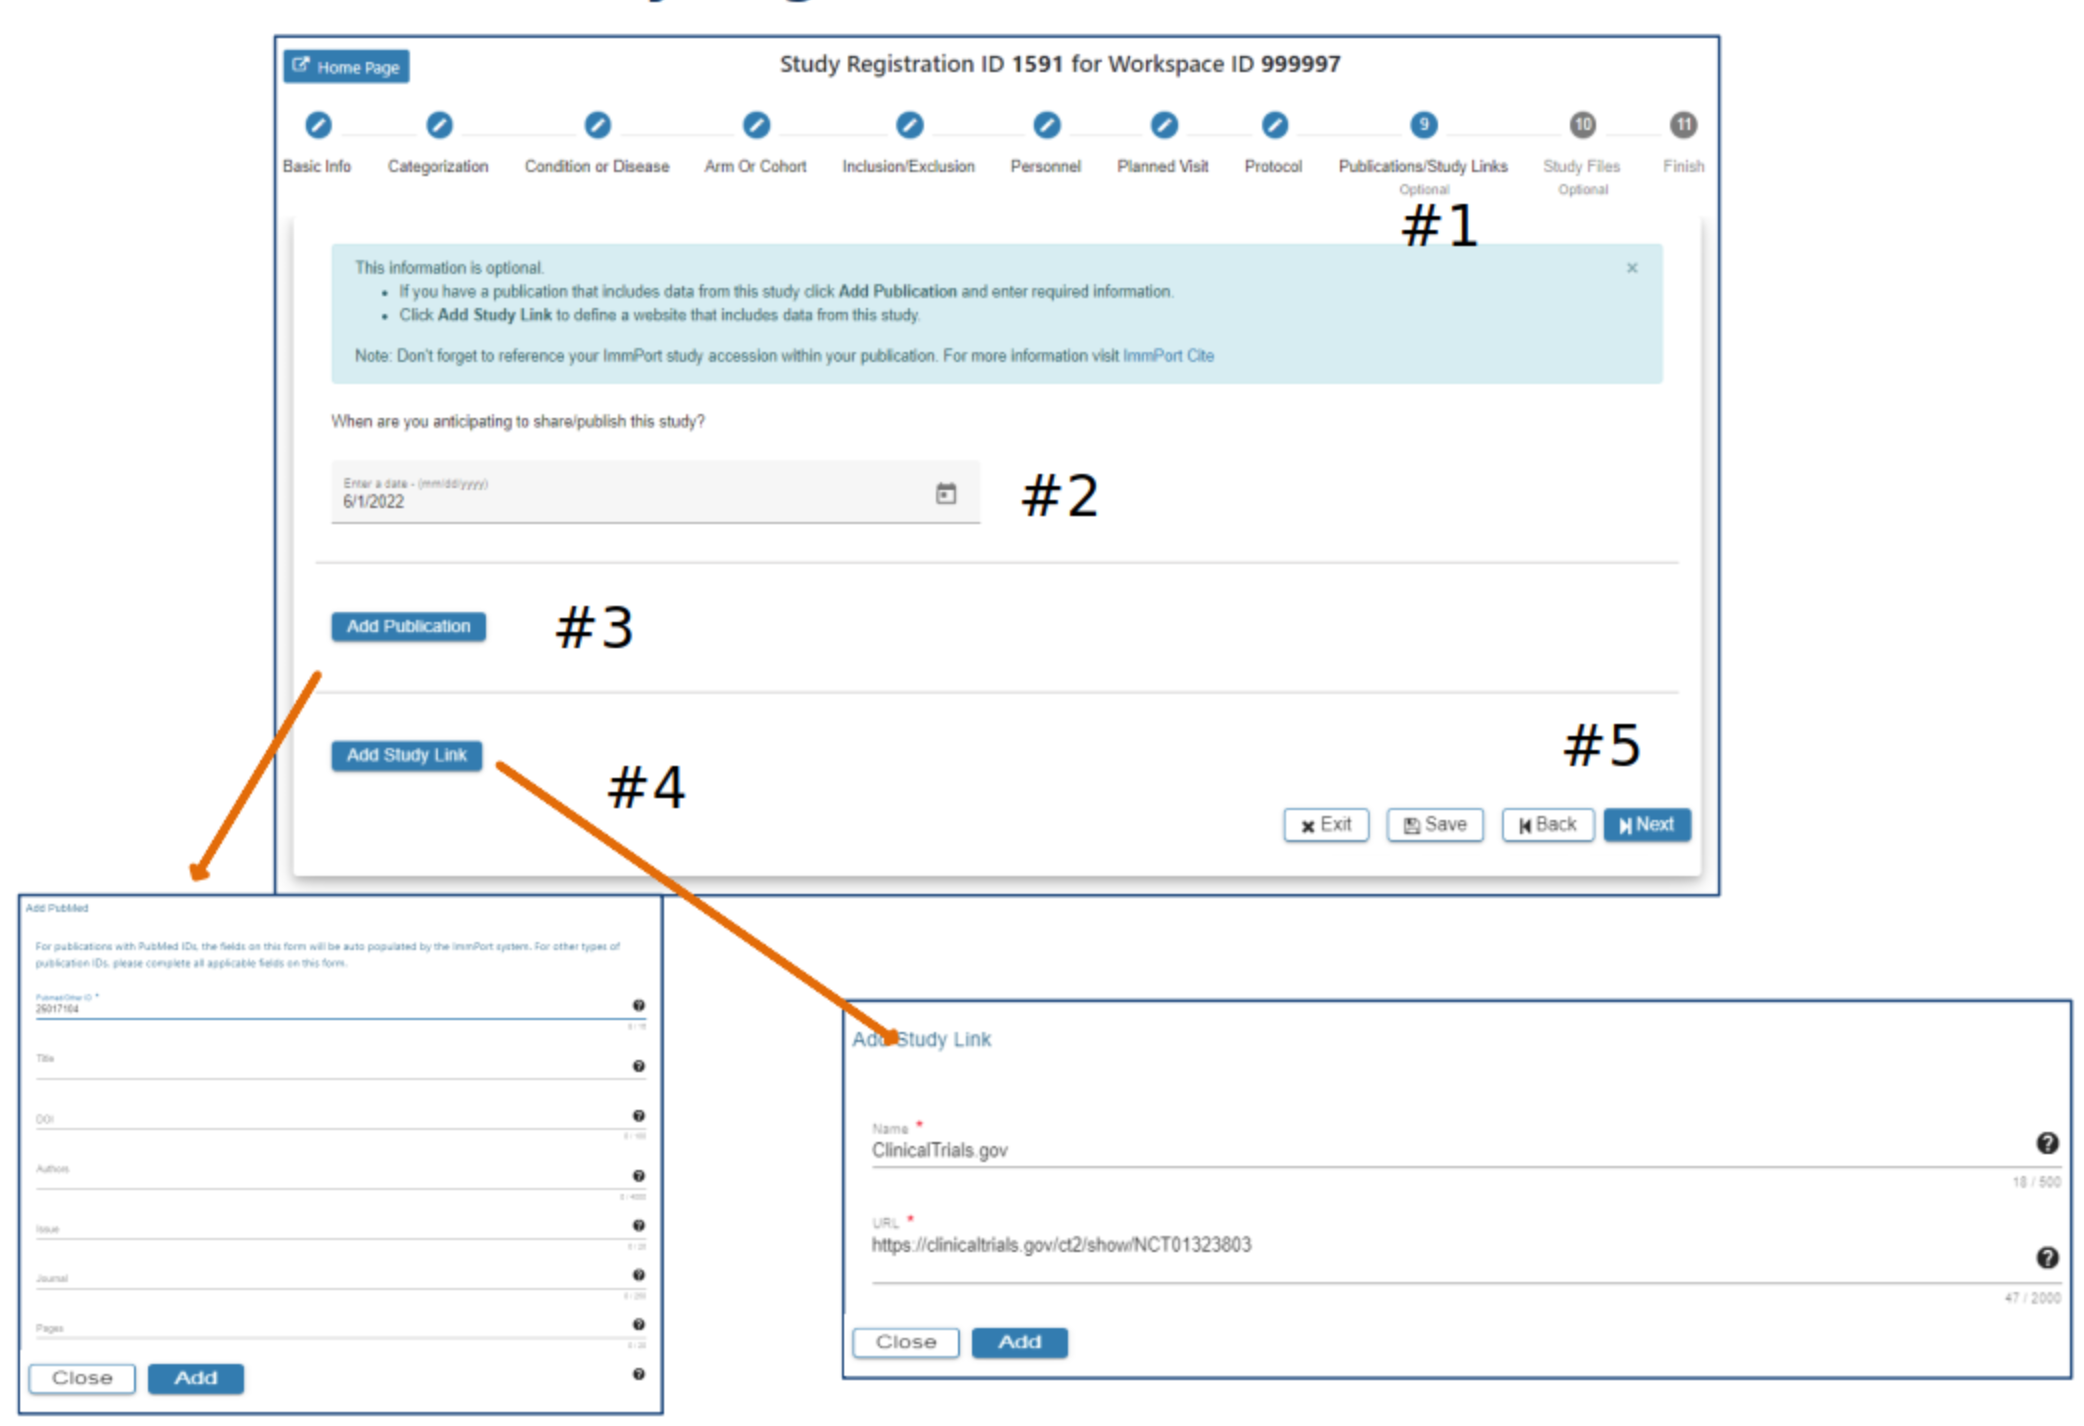
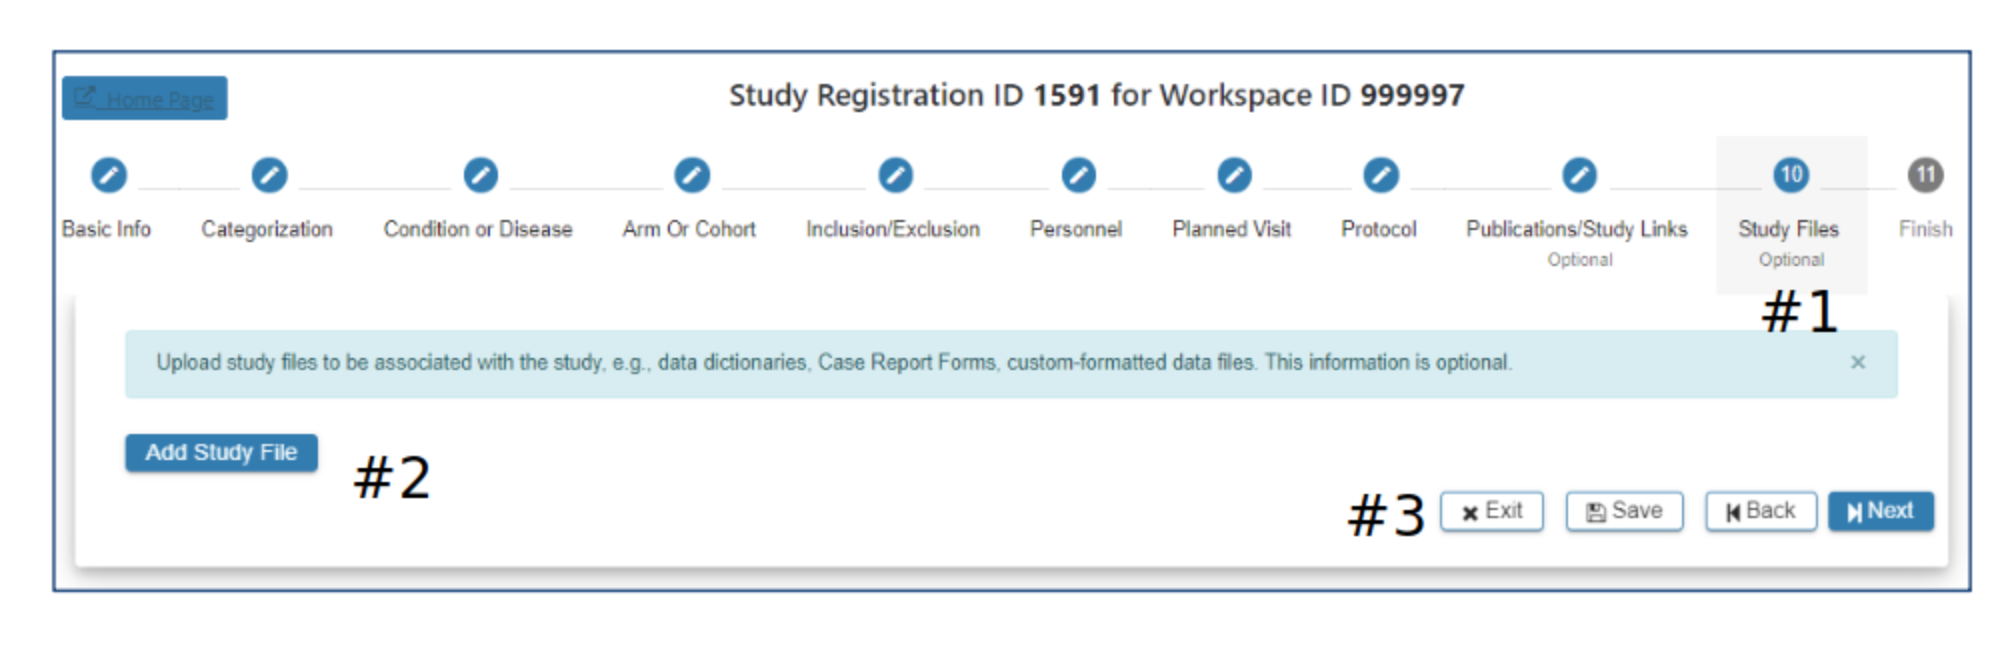
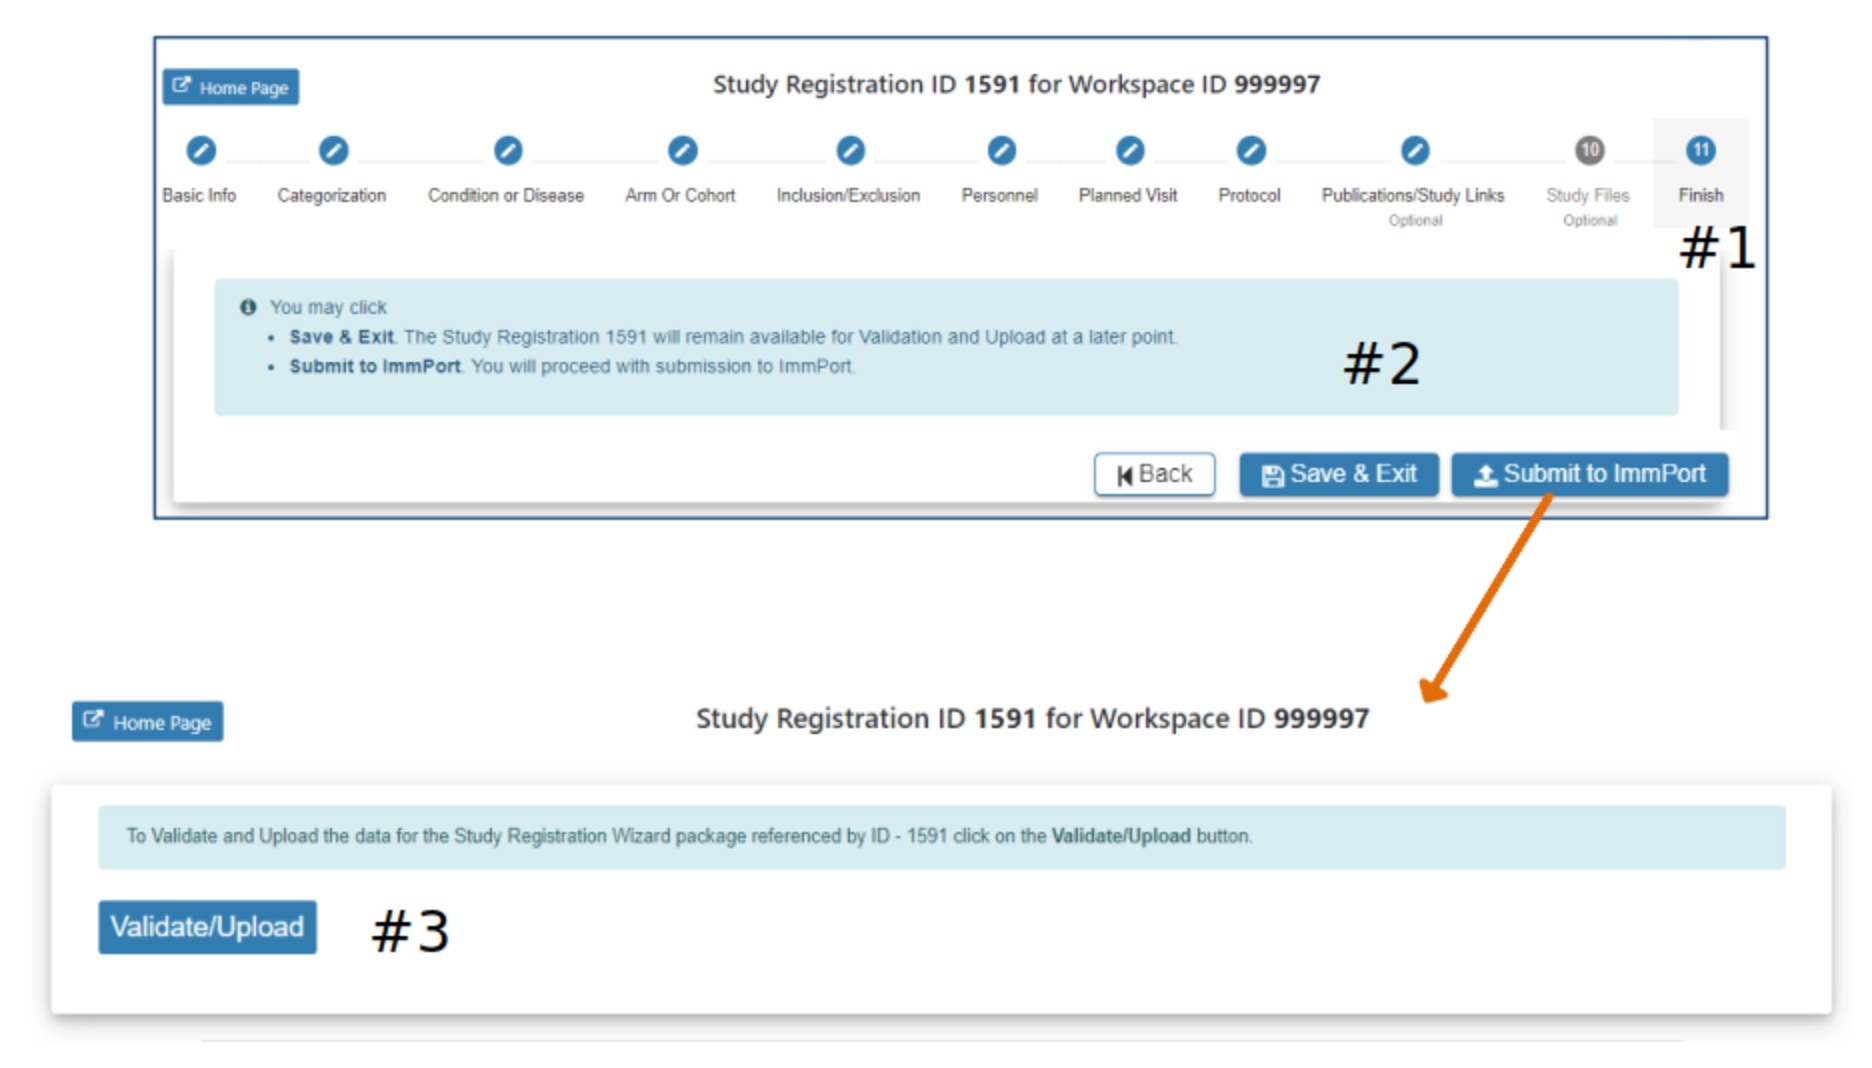
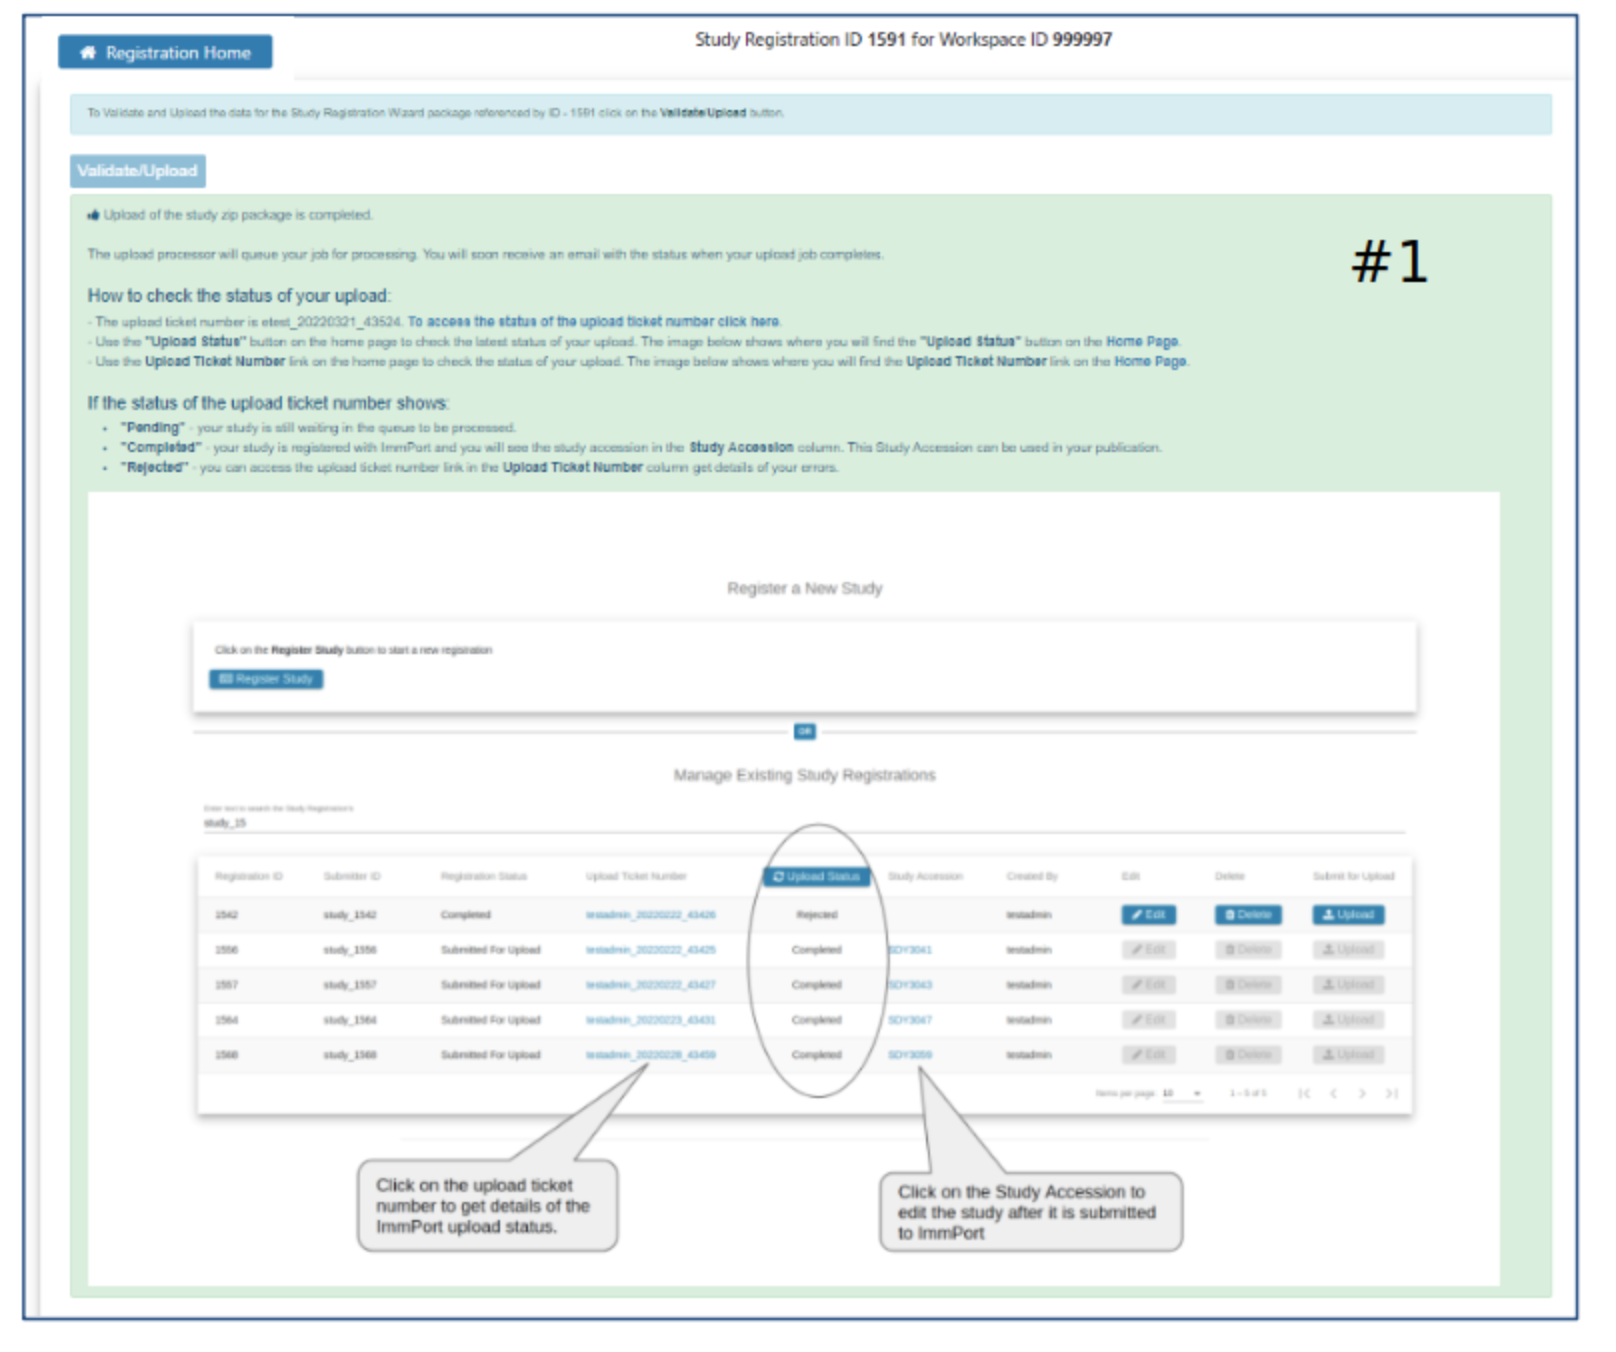
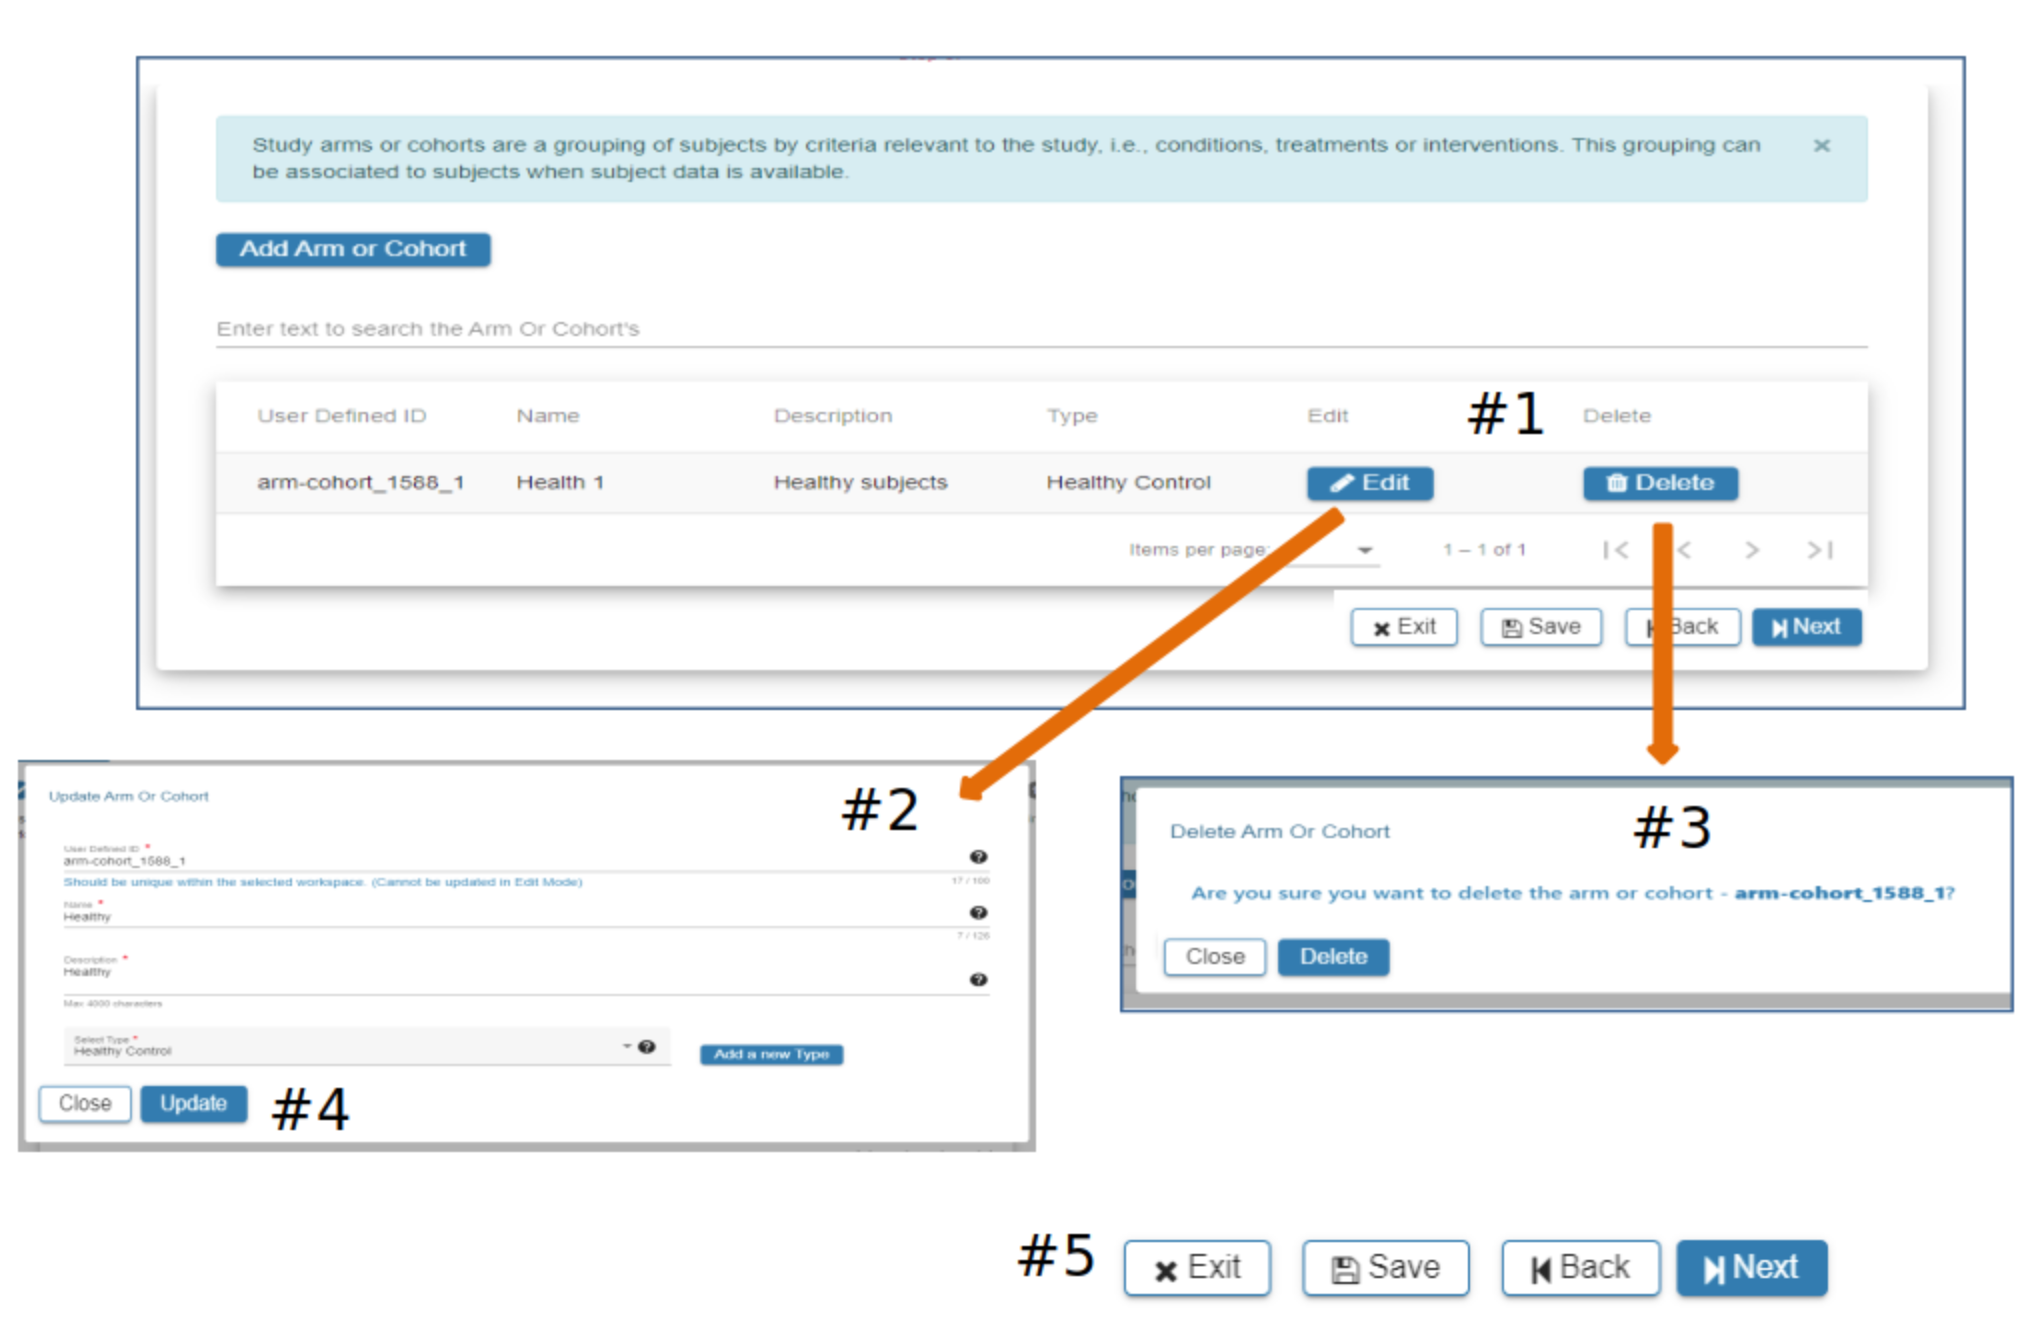
The same walkthrough is available as a PDF and as PowerPoint slides.
Option B: Basic Study Design template
- Download
basic_study_designandprotocolsfrom the Template Catalog. - Fill them in.
basic_study_designhas several sections. Theplanned_visit,inclusion_exclusionandstudy_2_protocolsections each need at least one row (rule R-17). - Put both templates and your protocol documents in one
.zip. You can include subject templates in the same package. - Validate and upload the package.
Changing a registered study
Use the study_design_edit template to add or update publications, links, files and other study details after registration. Upload it like any other template. For anything it can't change, contact the ImmPort Helpdesk.